Setting Up Your Physical AI Laboratory
By the end of this guide, you will have:
- NVIDIA Isaac Sim 5.1.0 running in Docker (robotics simulator)
- NVIDIA Isaac Lab for reinforcement learning experiments
- A launcher script that handles everything - NGC login, image downloads, setup
- A reproducible setup you can share with others
Time required: ~2 hours (mostly waiting for downloads)
The Easy Path: After installing Docker (Section 3), download our launcher script (v2.2.0) - it handles everything else!
wget https://raw.githubusercontent.com/myidentity/physical-ai-lab/main/scripts/auto_start.sh
chmod +x auto_start.sh
./auto_start.sh
1. Introduction
Why This Guide Exists
When I started learning robotics simulation, I hit wall after wall:
- Documentation assumed I knew things I didn’t
- Tutorials were outdated or incomplete
- Small configuration mistakes wasted hours
This guide documents every step - including the mistakes - so you don’t have to struggle like I did.
What You’ll Learn
| Section | What You’ll Do | Can Skip If… |
|---|---|---|
| 2. Prerequisites | Install NVIDIA drivers | Already have working drivers |
| 3. Docker Setup | Install Docker & NVIDIA toolkit | Already have Docker with GPU |
| 4. Quick Start | Use launcher script for easy setup | Want manual control |
| 5. Verification | Test everything works | Confident it works |
| 6. Troubleshooting | Fix common problems | Everything works |
| Appendix A | Manual installation steps | Using the launcher |
| Appendix B | Docker & Isaac Sim concepts | Already know Docker |
2. Prerequisites
Hardware Requirements
- GPU: NVIDIA RTX series (RTX 2070 or better)
- VRAM: 8GB minimum, 12GB+ recommended
- RAM: 32GB recommended
- Storage: 50GB+ free space (Docker images are large!)
- OS: Ubuntu 22.04 or 24.04 LTS
Install NVIDIA Drivers
First, check if drivers are already installed:
nvidia-smiIf drivers are installed, you’ll see a table showing your GPU model, driver version, and CUDA version. If you see command not found, follow the steps below.
If nvidia-smi fails, install drivers:
# Step 1: Update your system
sudo apt update && sudo apt upgrade -y

# Step 2: See which drivers are available for your GPU
sudo ubuntu-drivers list --gpgpu

# Step 3: Install the recommended driver automatically
sudo ubuntu-drivers install --gpgpu

# Step 4: Reboot (required!)
sudo reboot
After reboot, verify:
nvidia-smiIf your computer uses Secure Boot, you’ll see extra steps during installation. Ubuntu will ask you to create a temporary password. After reboot, a blue “MOK Management” screen appears - select “Enroll MOK”, enter the password, and reboot.
If you miss this screen, reinstall: sudo ubuntu-drivers install --gpgpu
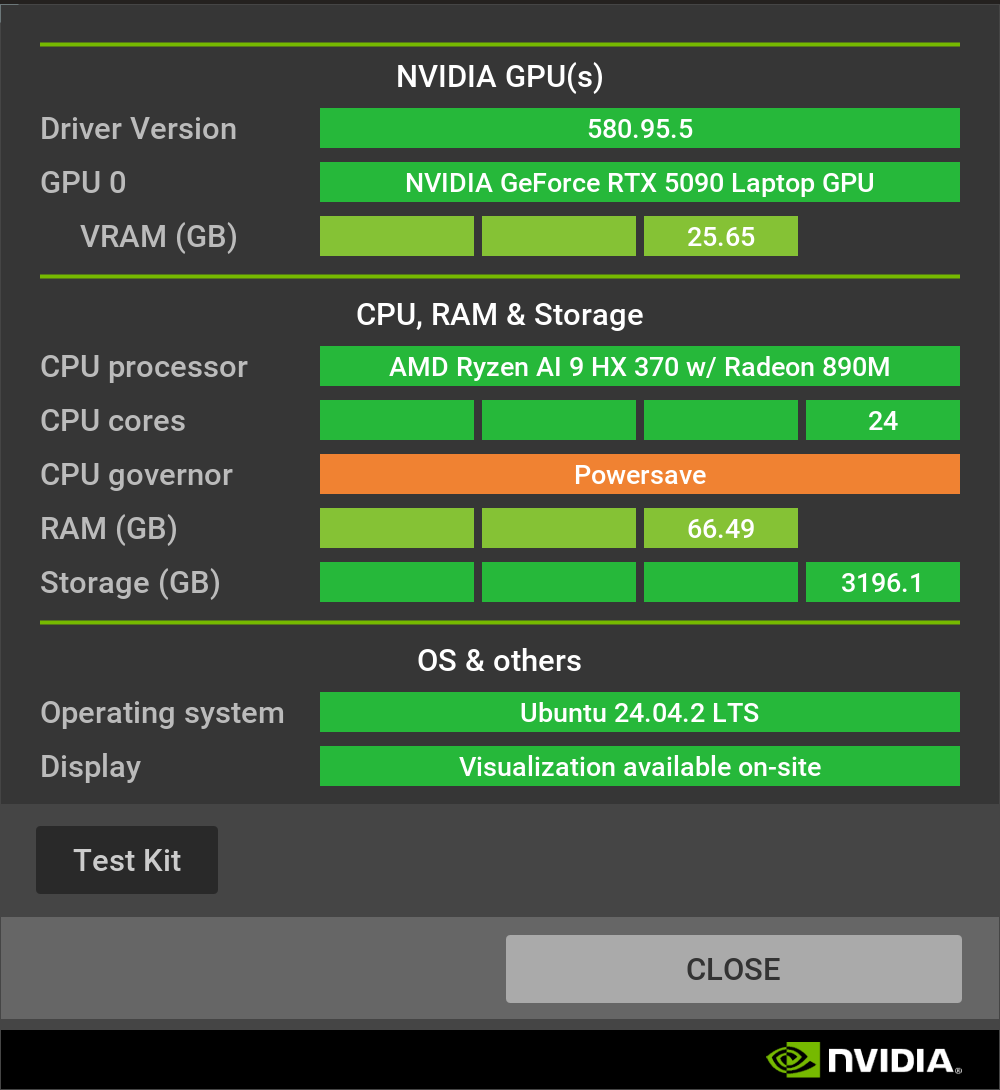
Our Test System
This guide was tested on:
| Component | Specification |
|---|---|
| OS | Ubuntu 24.04.3 LTS |
| Kernel | 6.14.0-37-generic |
| GPU | NVIDIA GeForce RTX 5090 Laptop GPU |
| Driver | 580.95.05 |
| Docker | 29.1.2 |
3. Docker Setup
Install Docker and configure it to use your NVIDIA GPU. This is required before using the launcher script.
Step 3.1: Install Docker
# Update package list
sudo apt update

# Install Docker
sudo apt install -y docker.io docker-compose-v2

# Add yourself to docker group (avoids needing sudo)
sudo usermod -aG docker $USERAfter adding yourself to the docker group, you must log out and log back in (or reboot) for it to take effect.
Alternatively, run this to apply immediately (current terminal only):
newgrp dockerStep 3.2: Verify Docker Works
docker run hello-worldYou should see “Hello from Docker!” message.
Step 3.3: Install NVIDIA Container Toolkit
This lets Docker containers access your GPU:
# Add NVIDIA repository
curl -fsSL https://nvidia.github.io/libnvidia-container/gpgkey | sudo gpg --dearmor -o /usr/share/keyrings/nvidia-container-toolkit-keyring.gpg

curl -s -L https://nvidia.github.io/libnvidia-container/stable/deb/nvidia-container-toolkit.list | \
  sed 's#deb https://#deb [signed-by=/usr/share/keyrings/nvidia-container-toolkit-keyring.gpg] https://#g' | \
  sudo tee /etc/apt/sources.list.d/nvidia-container-toolkit.list

# Install the toolkit
sudo apt update
sudo apt install -y nvidia-container-toolkit

# Configure Docker to use NVIDIA runtime
sudo nvidia-ctk runtime configure --runtime=docker
sudo systemctl restart docker
Step 3.4: Verify GPU Access in Docker
docker run --rm --gpus all nvidia/cuda:12.0-base nvidia-smiYou should see the same nvidia-smi output as on your host.
If you see this error:
sudo systemctl restart dockerStill not working? Reboot your computer.
4. Quick Start with Launcher Script
Now that Docker is set up, use our launcher script to handle everything else: NGC login, downloading Isaac Sim, cloning Isaac Lab, and running containers.
Download the Launcher
Current version: v2.2.0
cd ~
wget https://raw.githubusercontent.com/myidentity/physical-ai-lab/main/scripts/auto_start.sh
chmod +x auto_start.sh
Run the Launcher
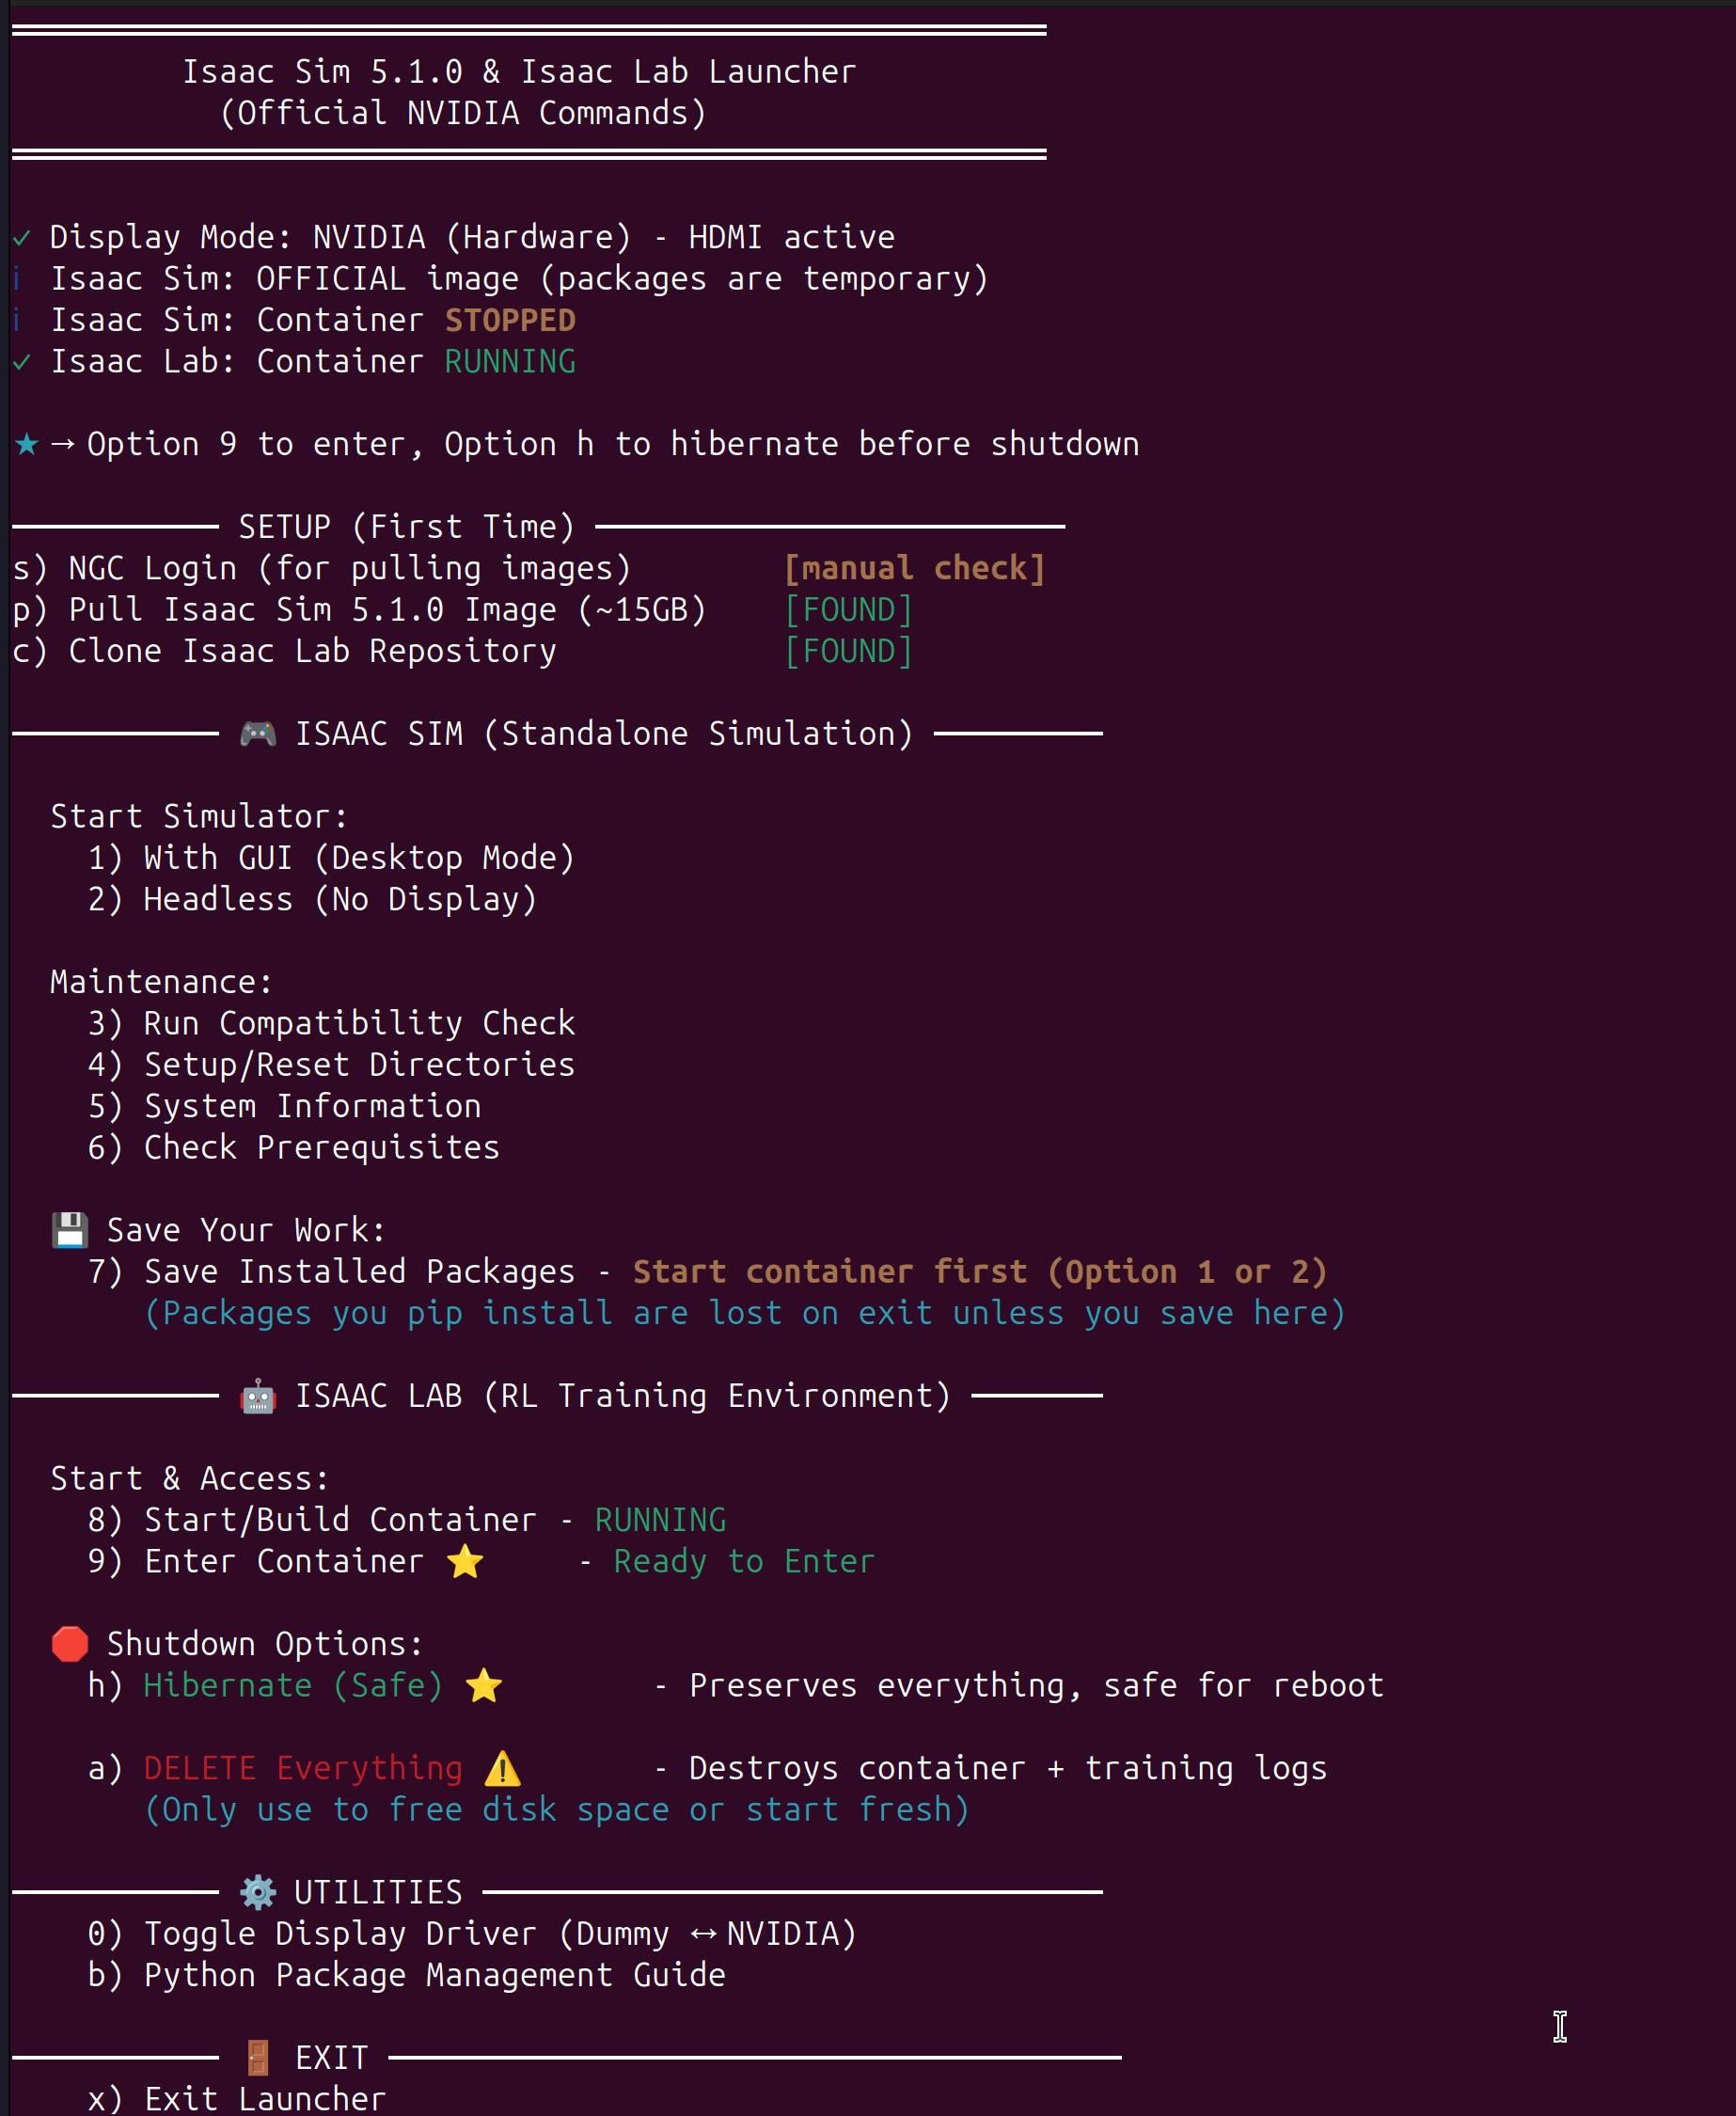
./auto_start.shYou’ll see a menu like this:
═══════════════════════════════════════════════════════
     Isaac Sim 5.1.0 & Isaac Lab Launcher v2.2.0
═══════════════════════════════════════════════════════

─────────── SETUP (First Time) ─────────────────────────
s) NGC Login (for pulling images)        [manual check]
p) Pull Isaac Sim 5.1.0 Image (~15GB)    [NOT FOUND]
c) Clone Isaac Lab Repository            [NOT FOUND]

─────────── 🎮 ISAAC SIM (Standalone Simulation) ─────────
  Start Simulator:
    1) With GUI (Desktop Mode)
    2) Headless (No Display)
  ...
  💾 Save Your Work:
    7) Save Installed Packages ⭐

─────────── 🤖 ISAAC LAB (RL Training Environment) ───────
  Start & Access:
    8) Start/Build Container ⭐
    9) Enter Container
  🛑 Shutdown Options:
    h) Hibernate (Safe) ⭐ - Preserves everything
    a) DELETE Everything ⚠️ - Destroys all data

─────────── ⚙️  UTILITIES ─────────────────────────────────
    0) Toggle Display Driver (Dummy ↔ NVIDIA)
    b) Python Package Guide
First-Time Setup Walkthrough
Follow these steps in order:
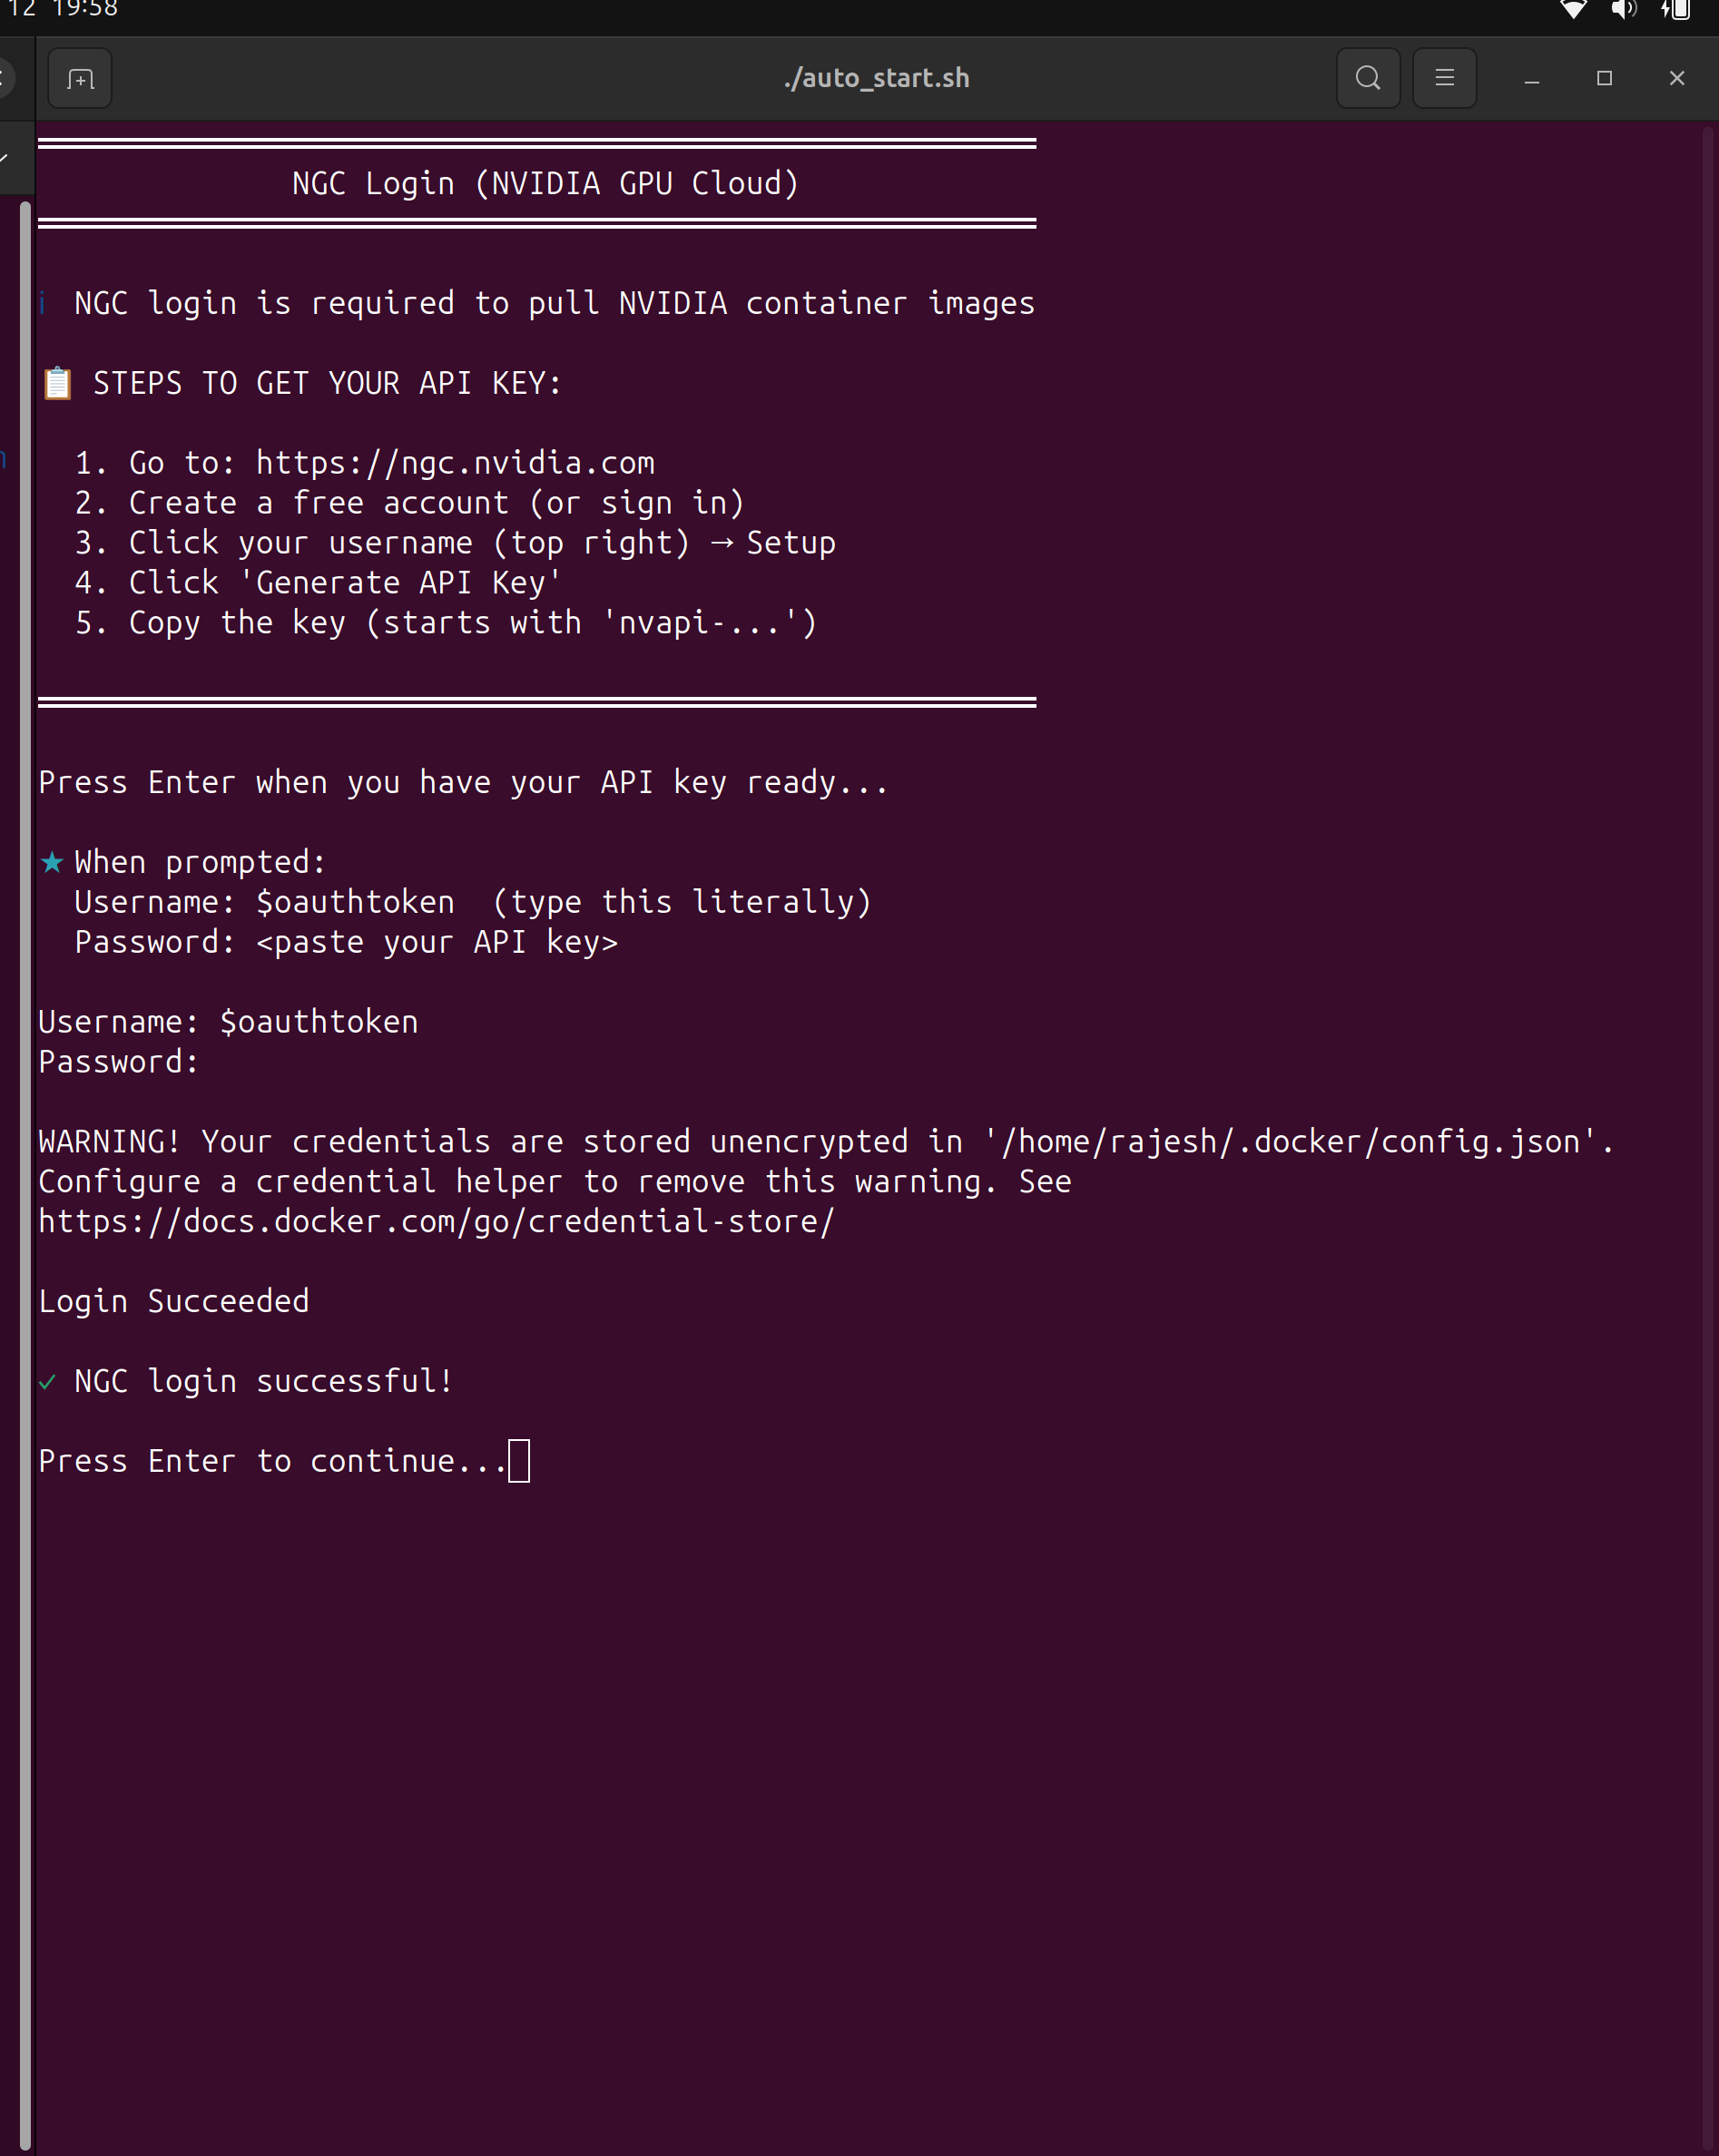
1. NGC Login (Option ‘s’):
You need an NVIDIA NGC account to download Isaac Sim:
- Go to https://ngc.nvidia.com and create a free account
- Go to Setup → API Key and generate a new key
- Select option ‘s’ in the launcher
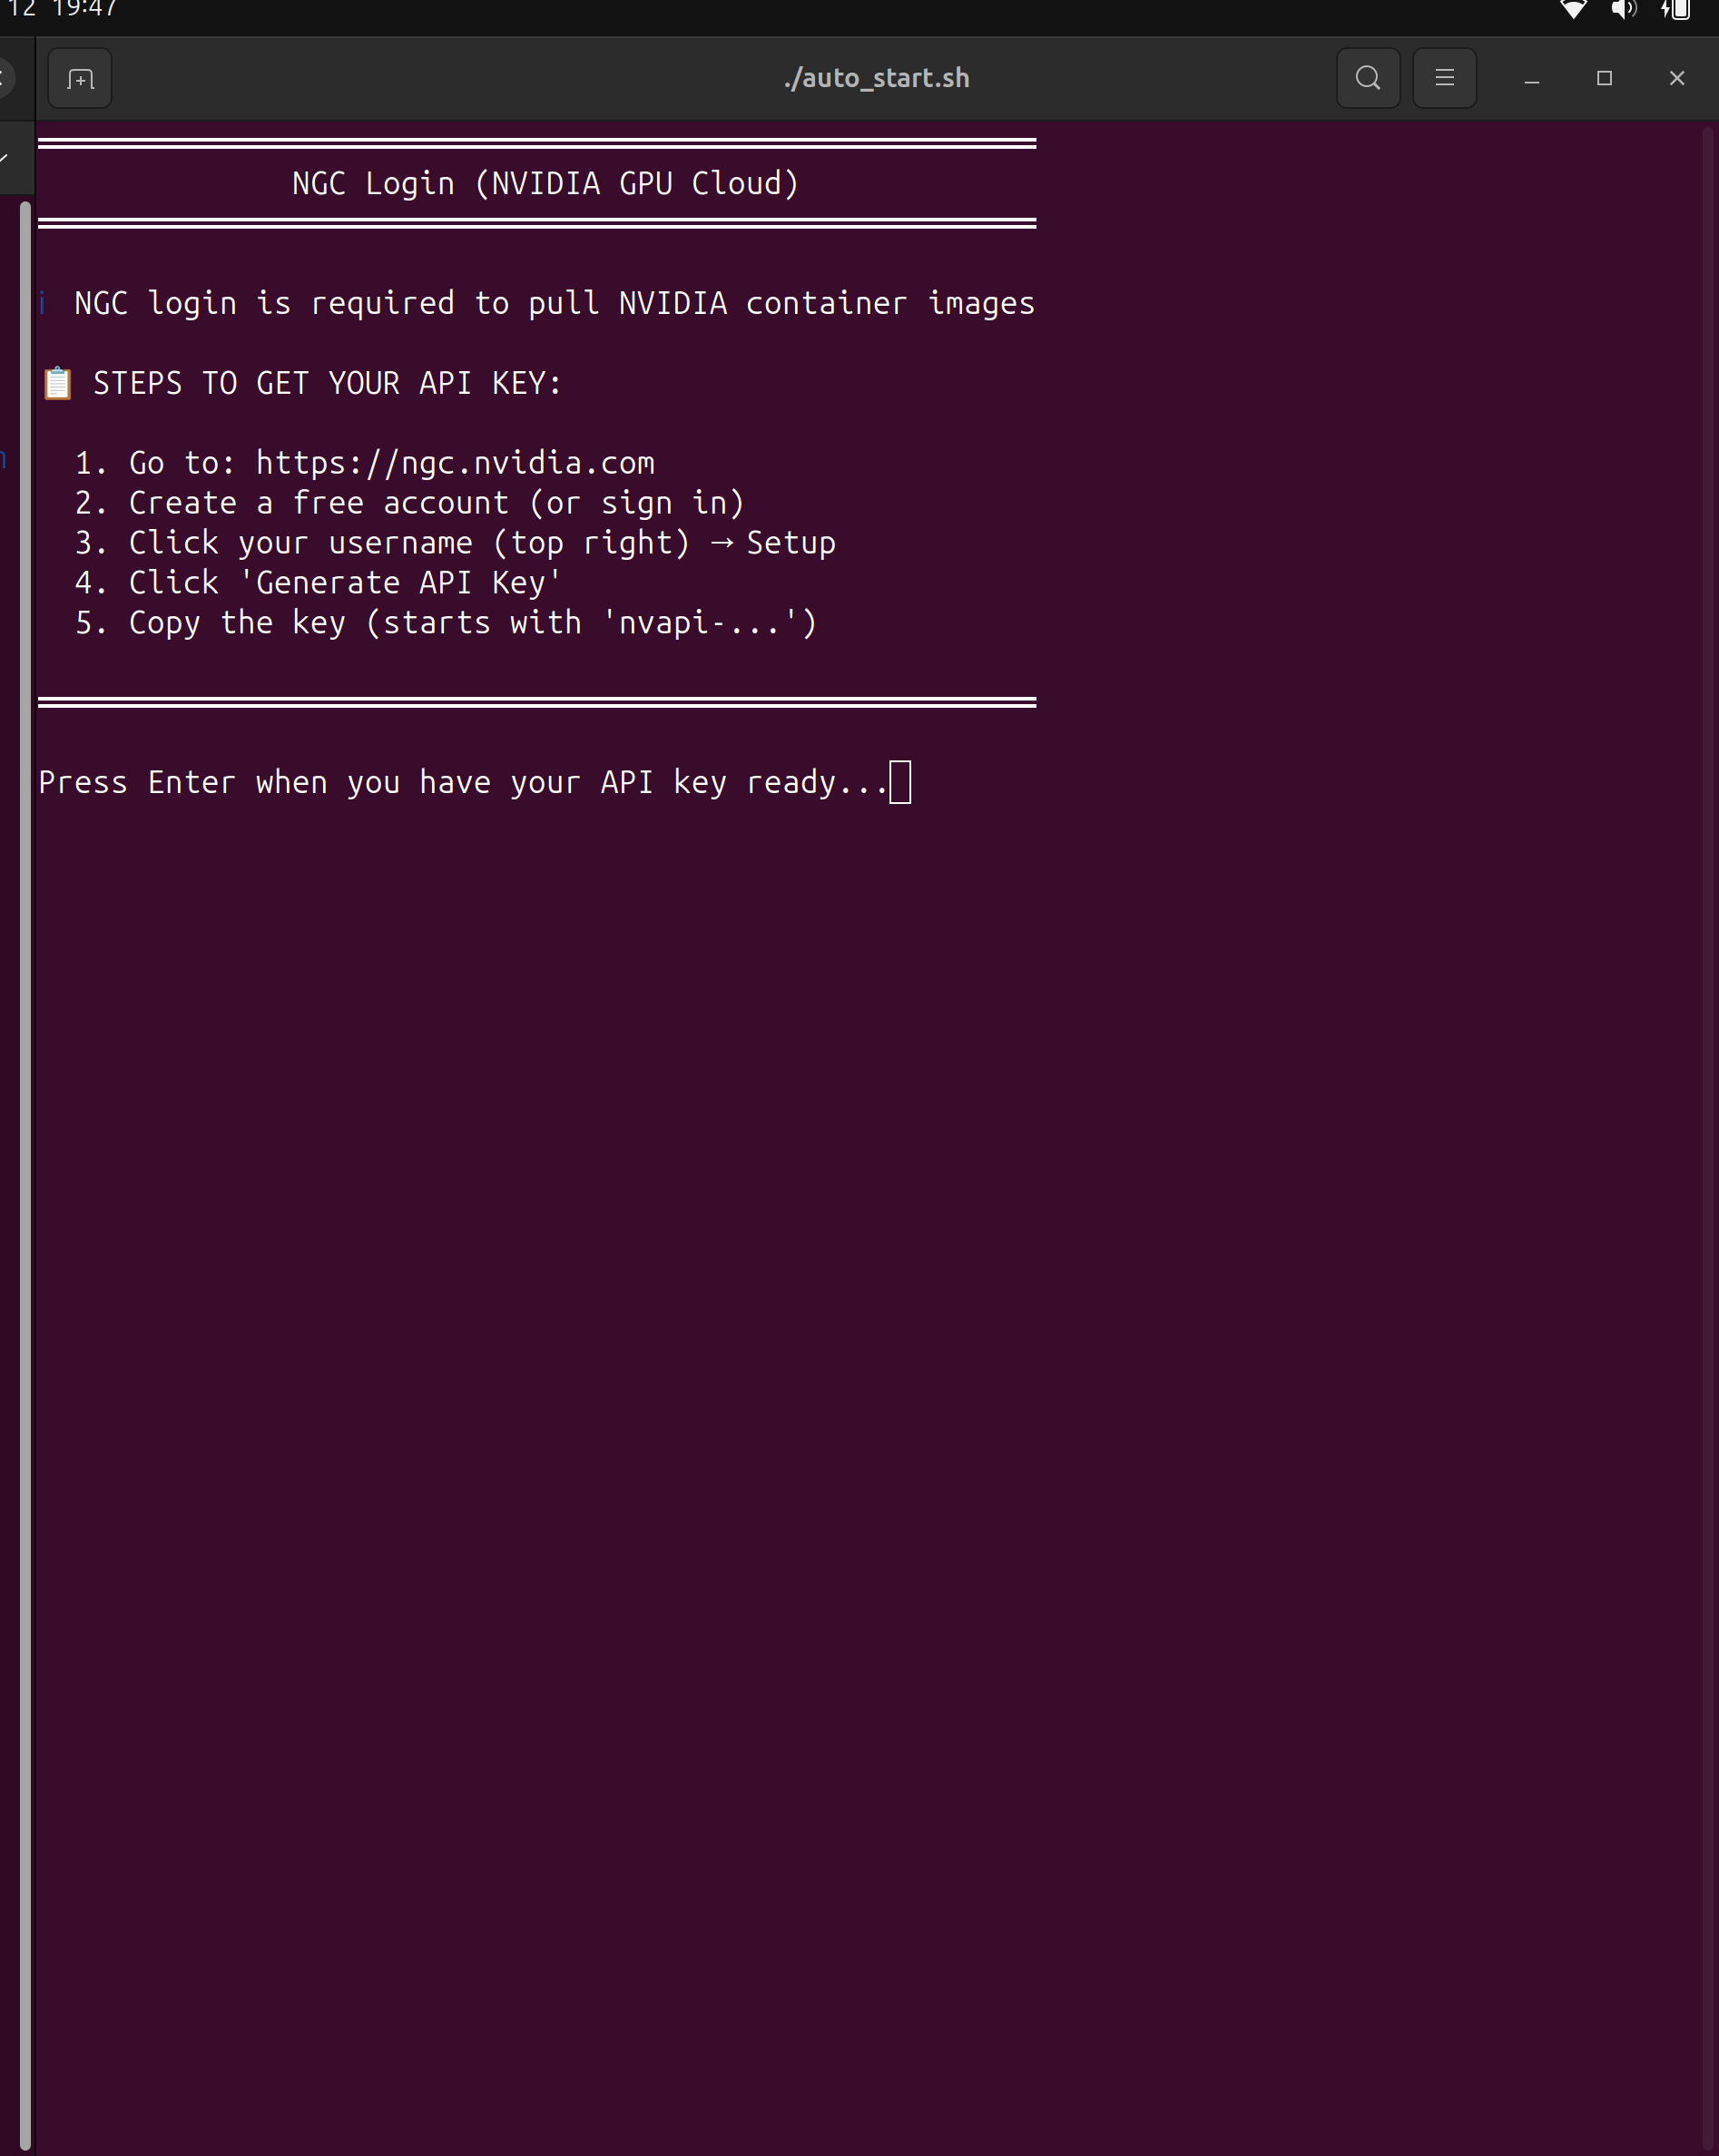
When prompted: - Username: $oauthtoken (literally type this) - Password: Your API key from NGC
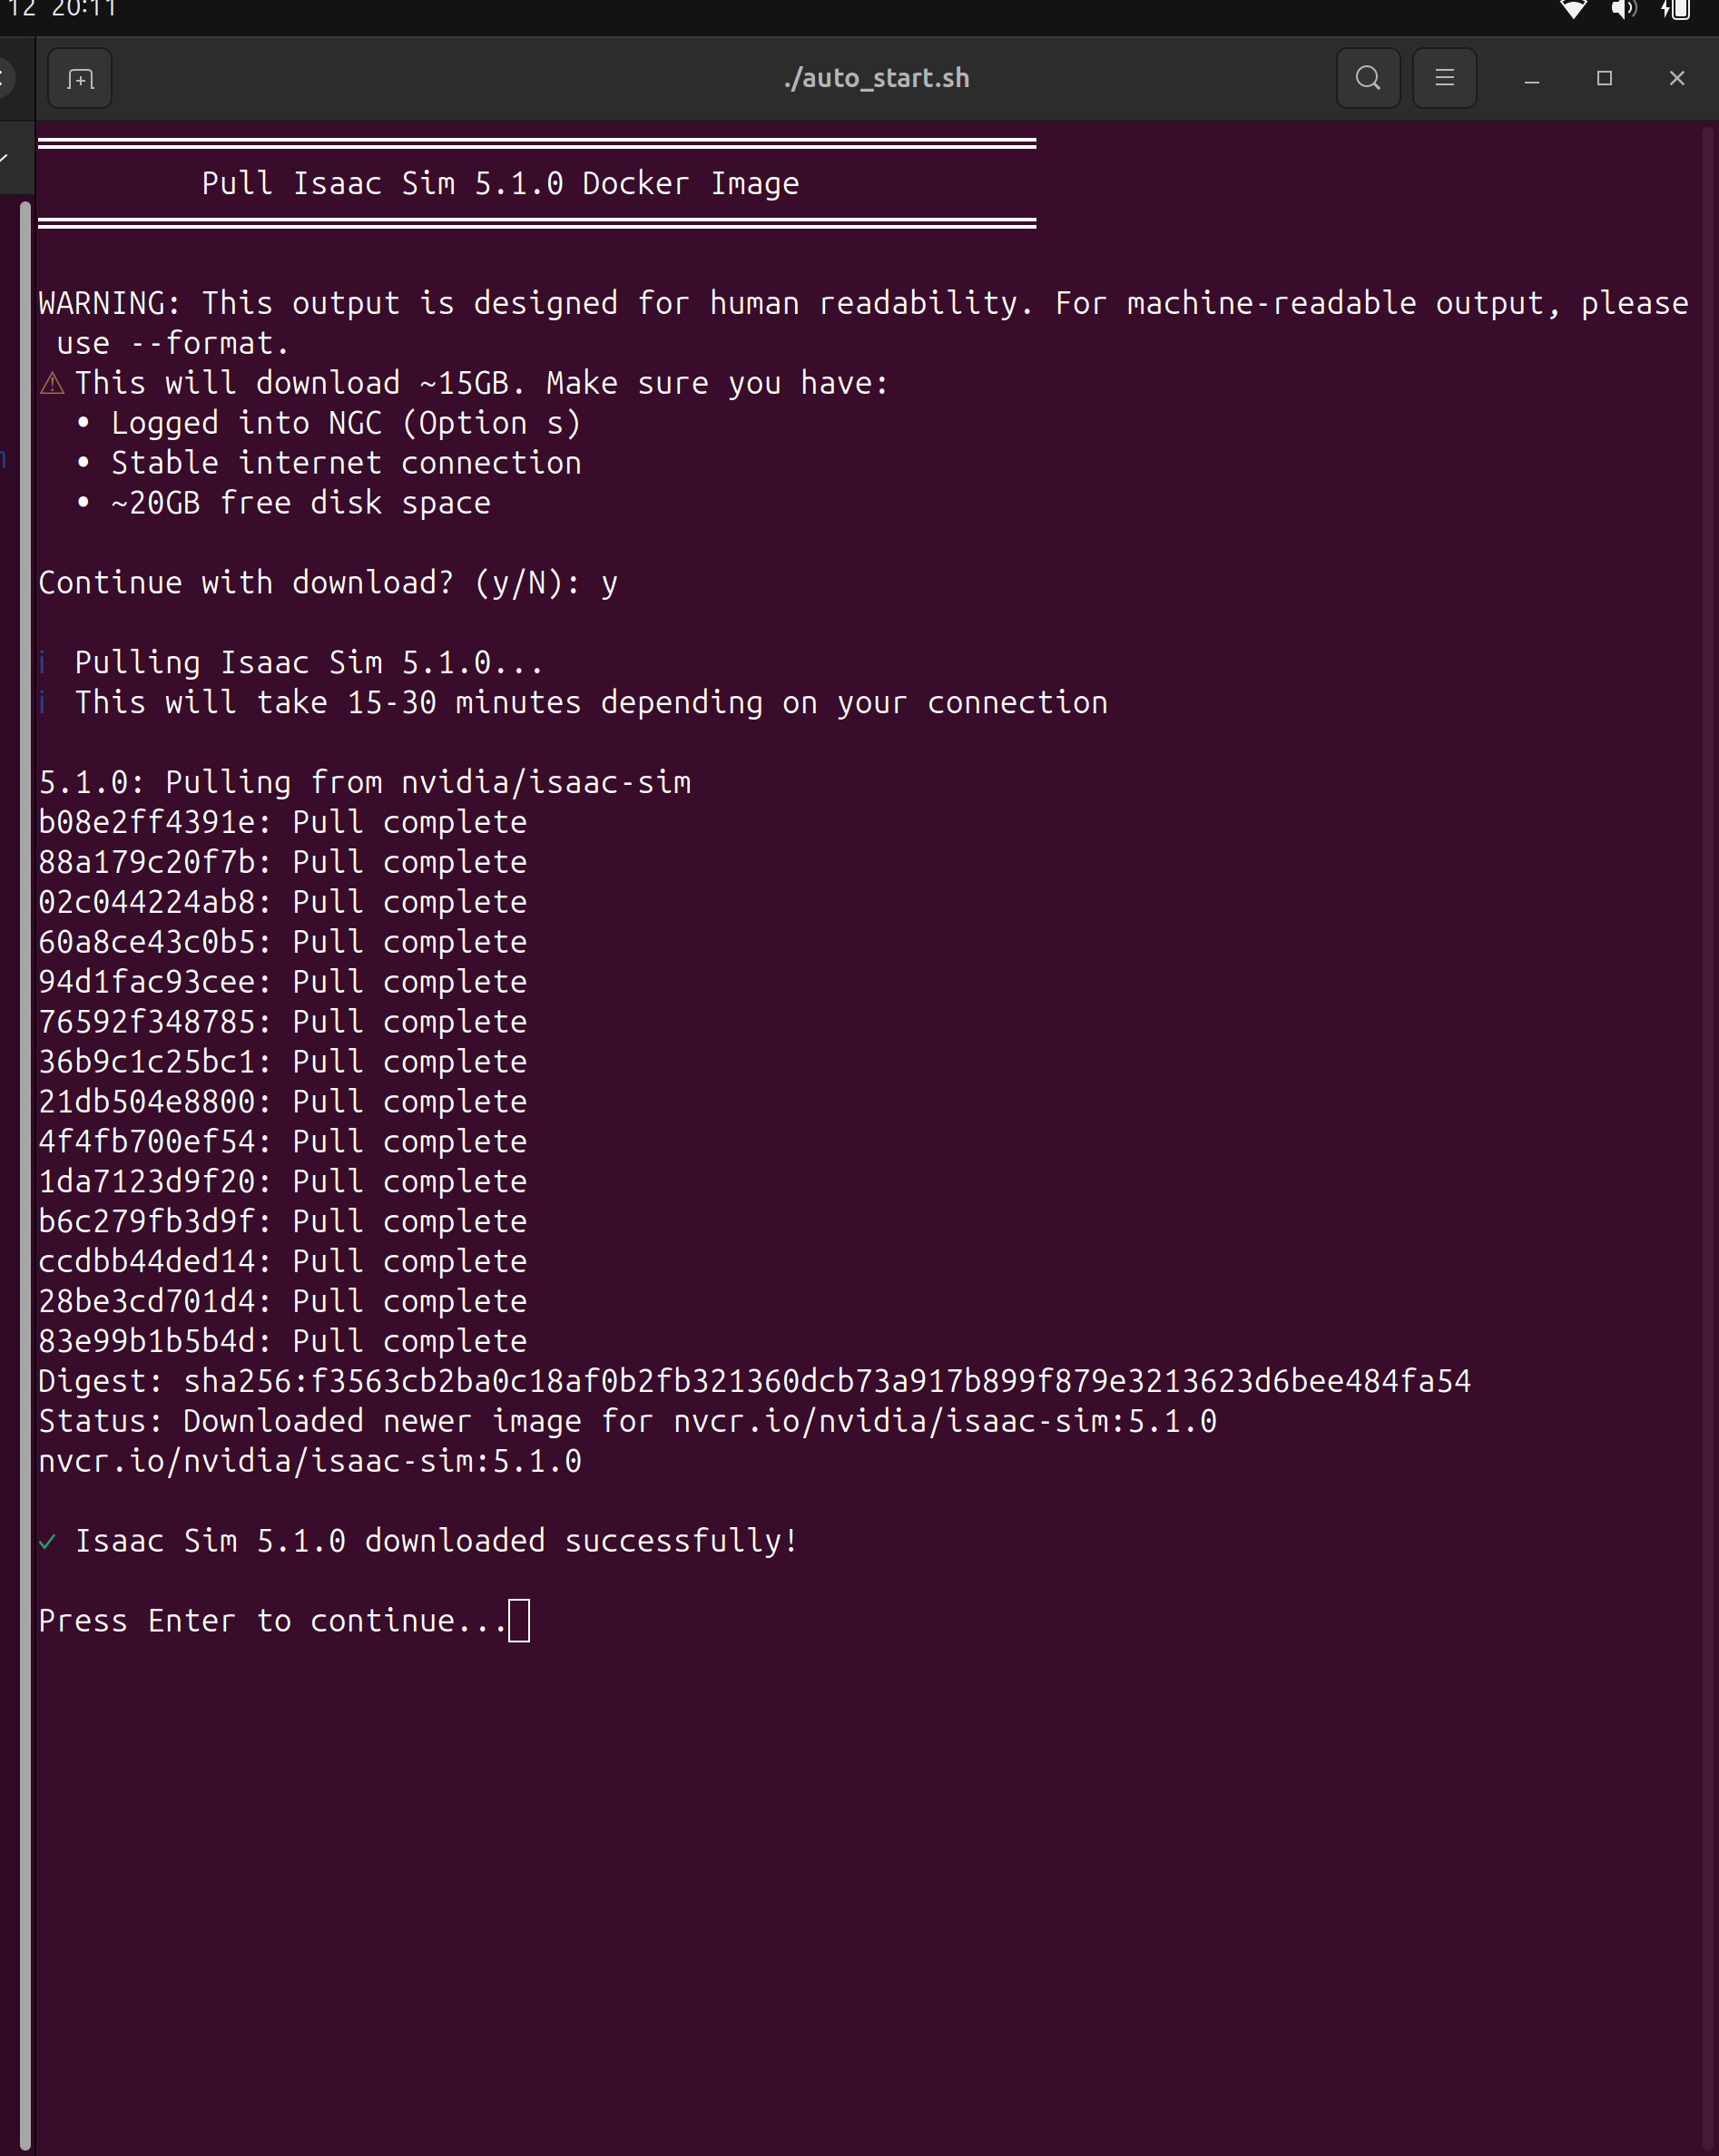
2. Pull Isaac Sim Image (Option ‘p’) - ~15GB download:

This download takes 15-30 minutes depending on your internet speed.

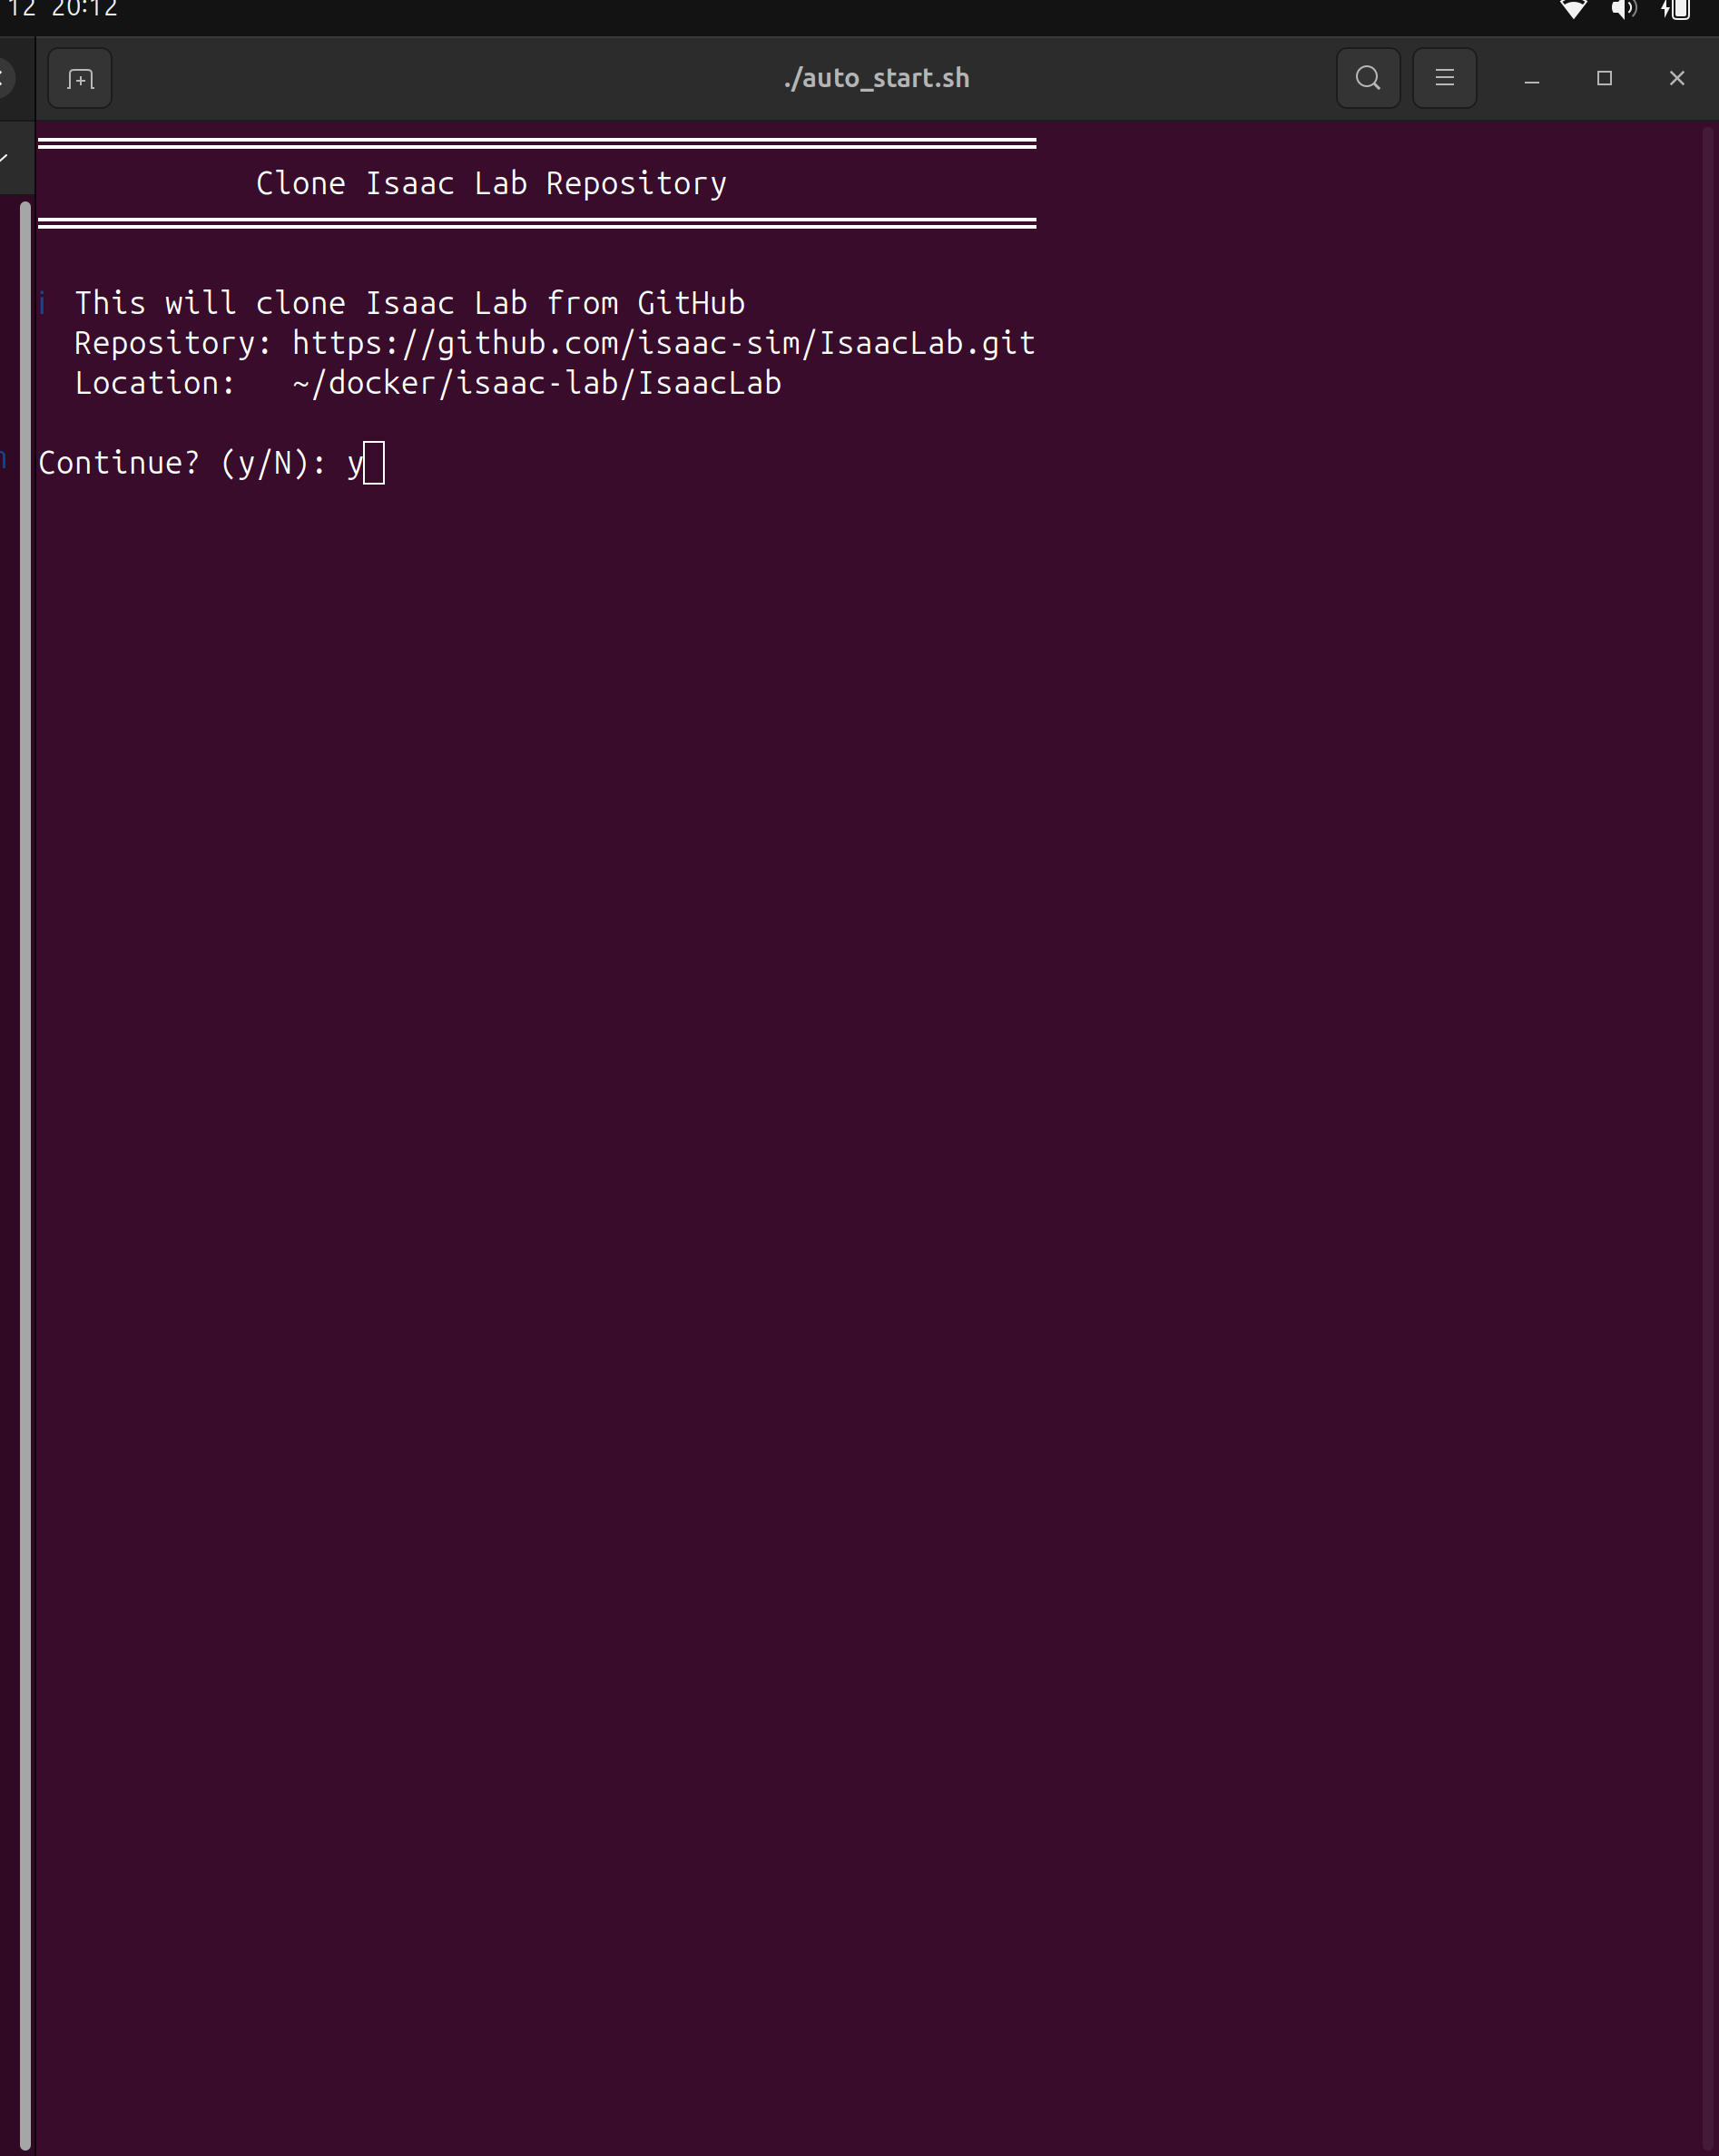
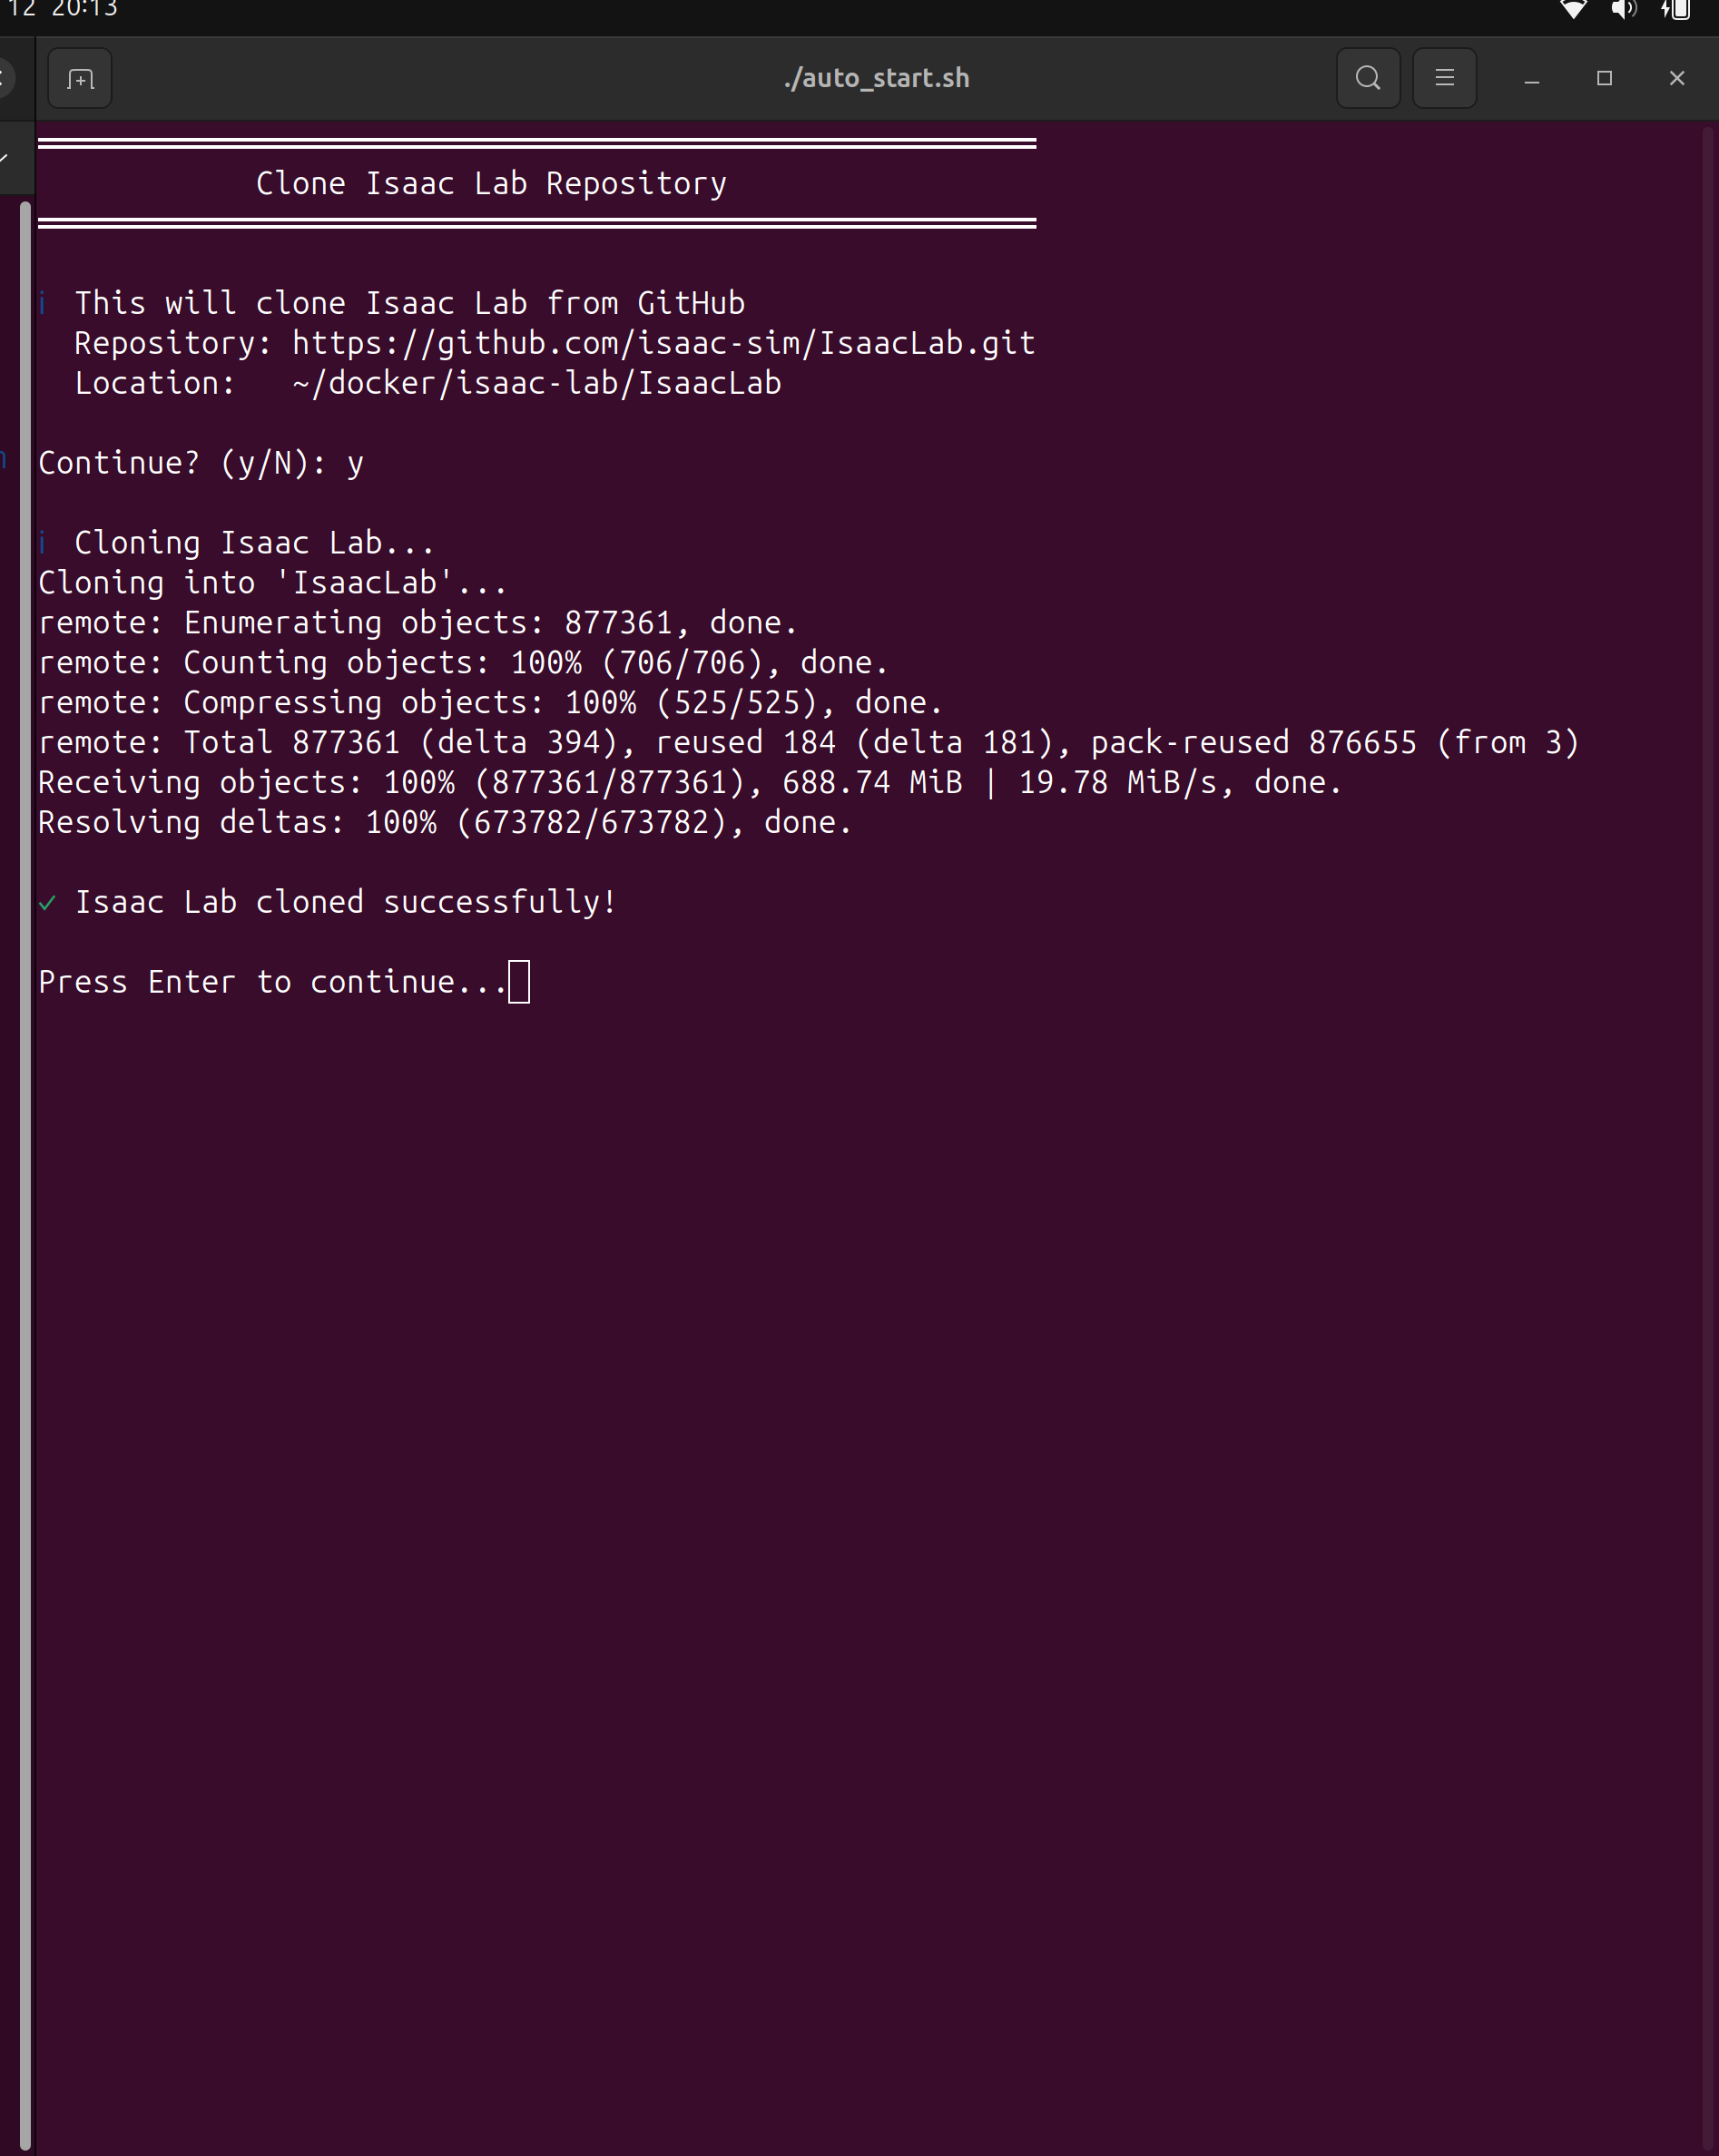
3. Clone Isaac Lab (Option ‘c’):
4. Menu after setup complete - all components [FOUND]:
5. Verification
Run Compatibility Check
Select Option 3 from the launcher to verify your system:
Look for “System checking result: PASSED” at the bottom.
Start Isaac Sim
Select Option 1 to start Isaac Sim with GUI. You’ll enter an interactive shell:
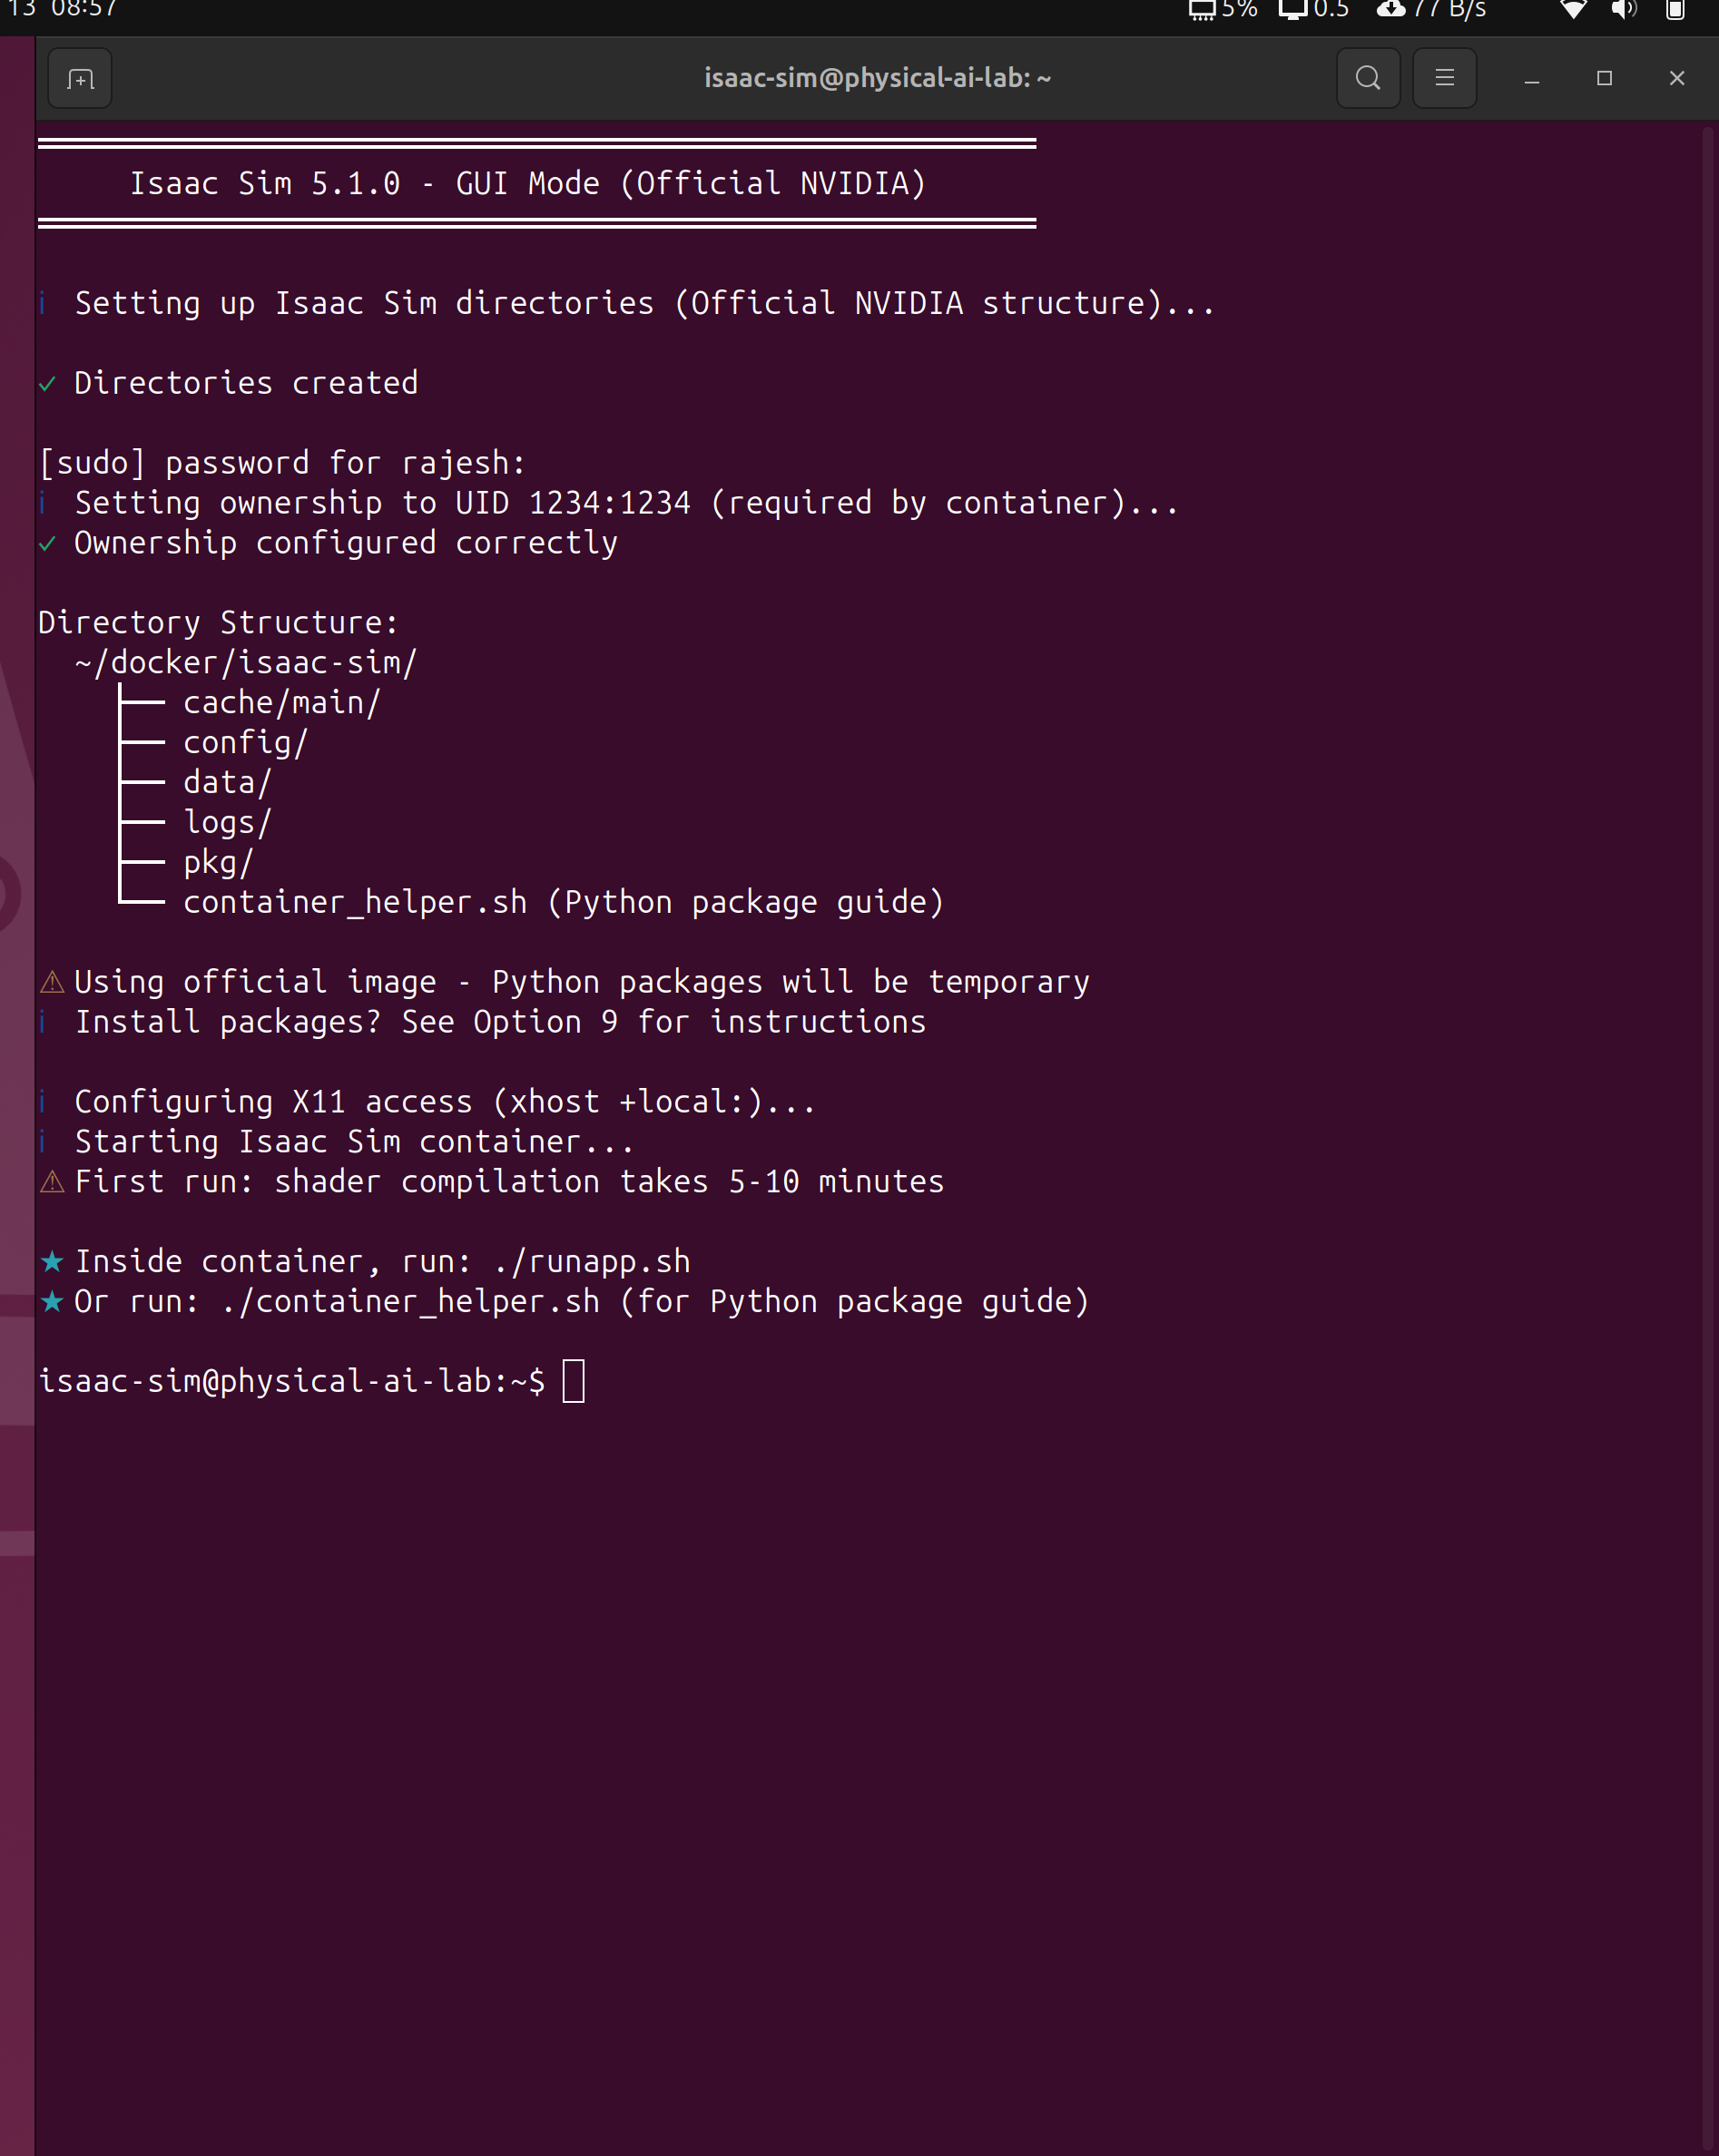
Inside the container, run ./runapp.sh to start the simulator:
The first time you run Isaac Sim, it compiles shaders for your GPU. This can take 5-10 minutes. Subsequent starts are much faster.
Your First Simulation
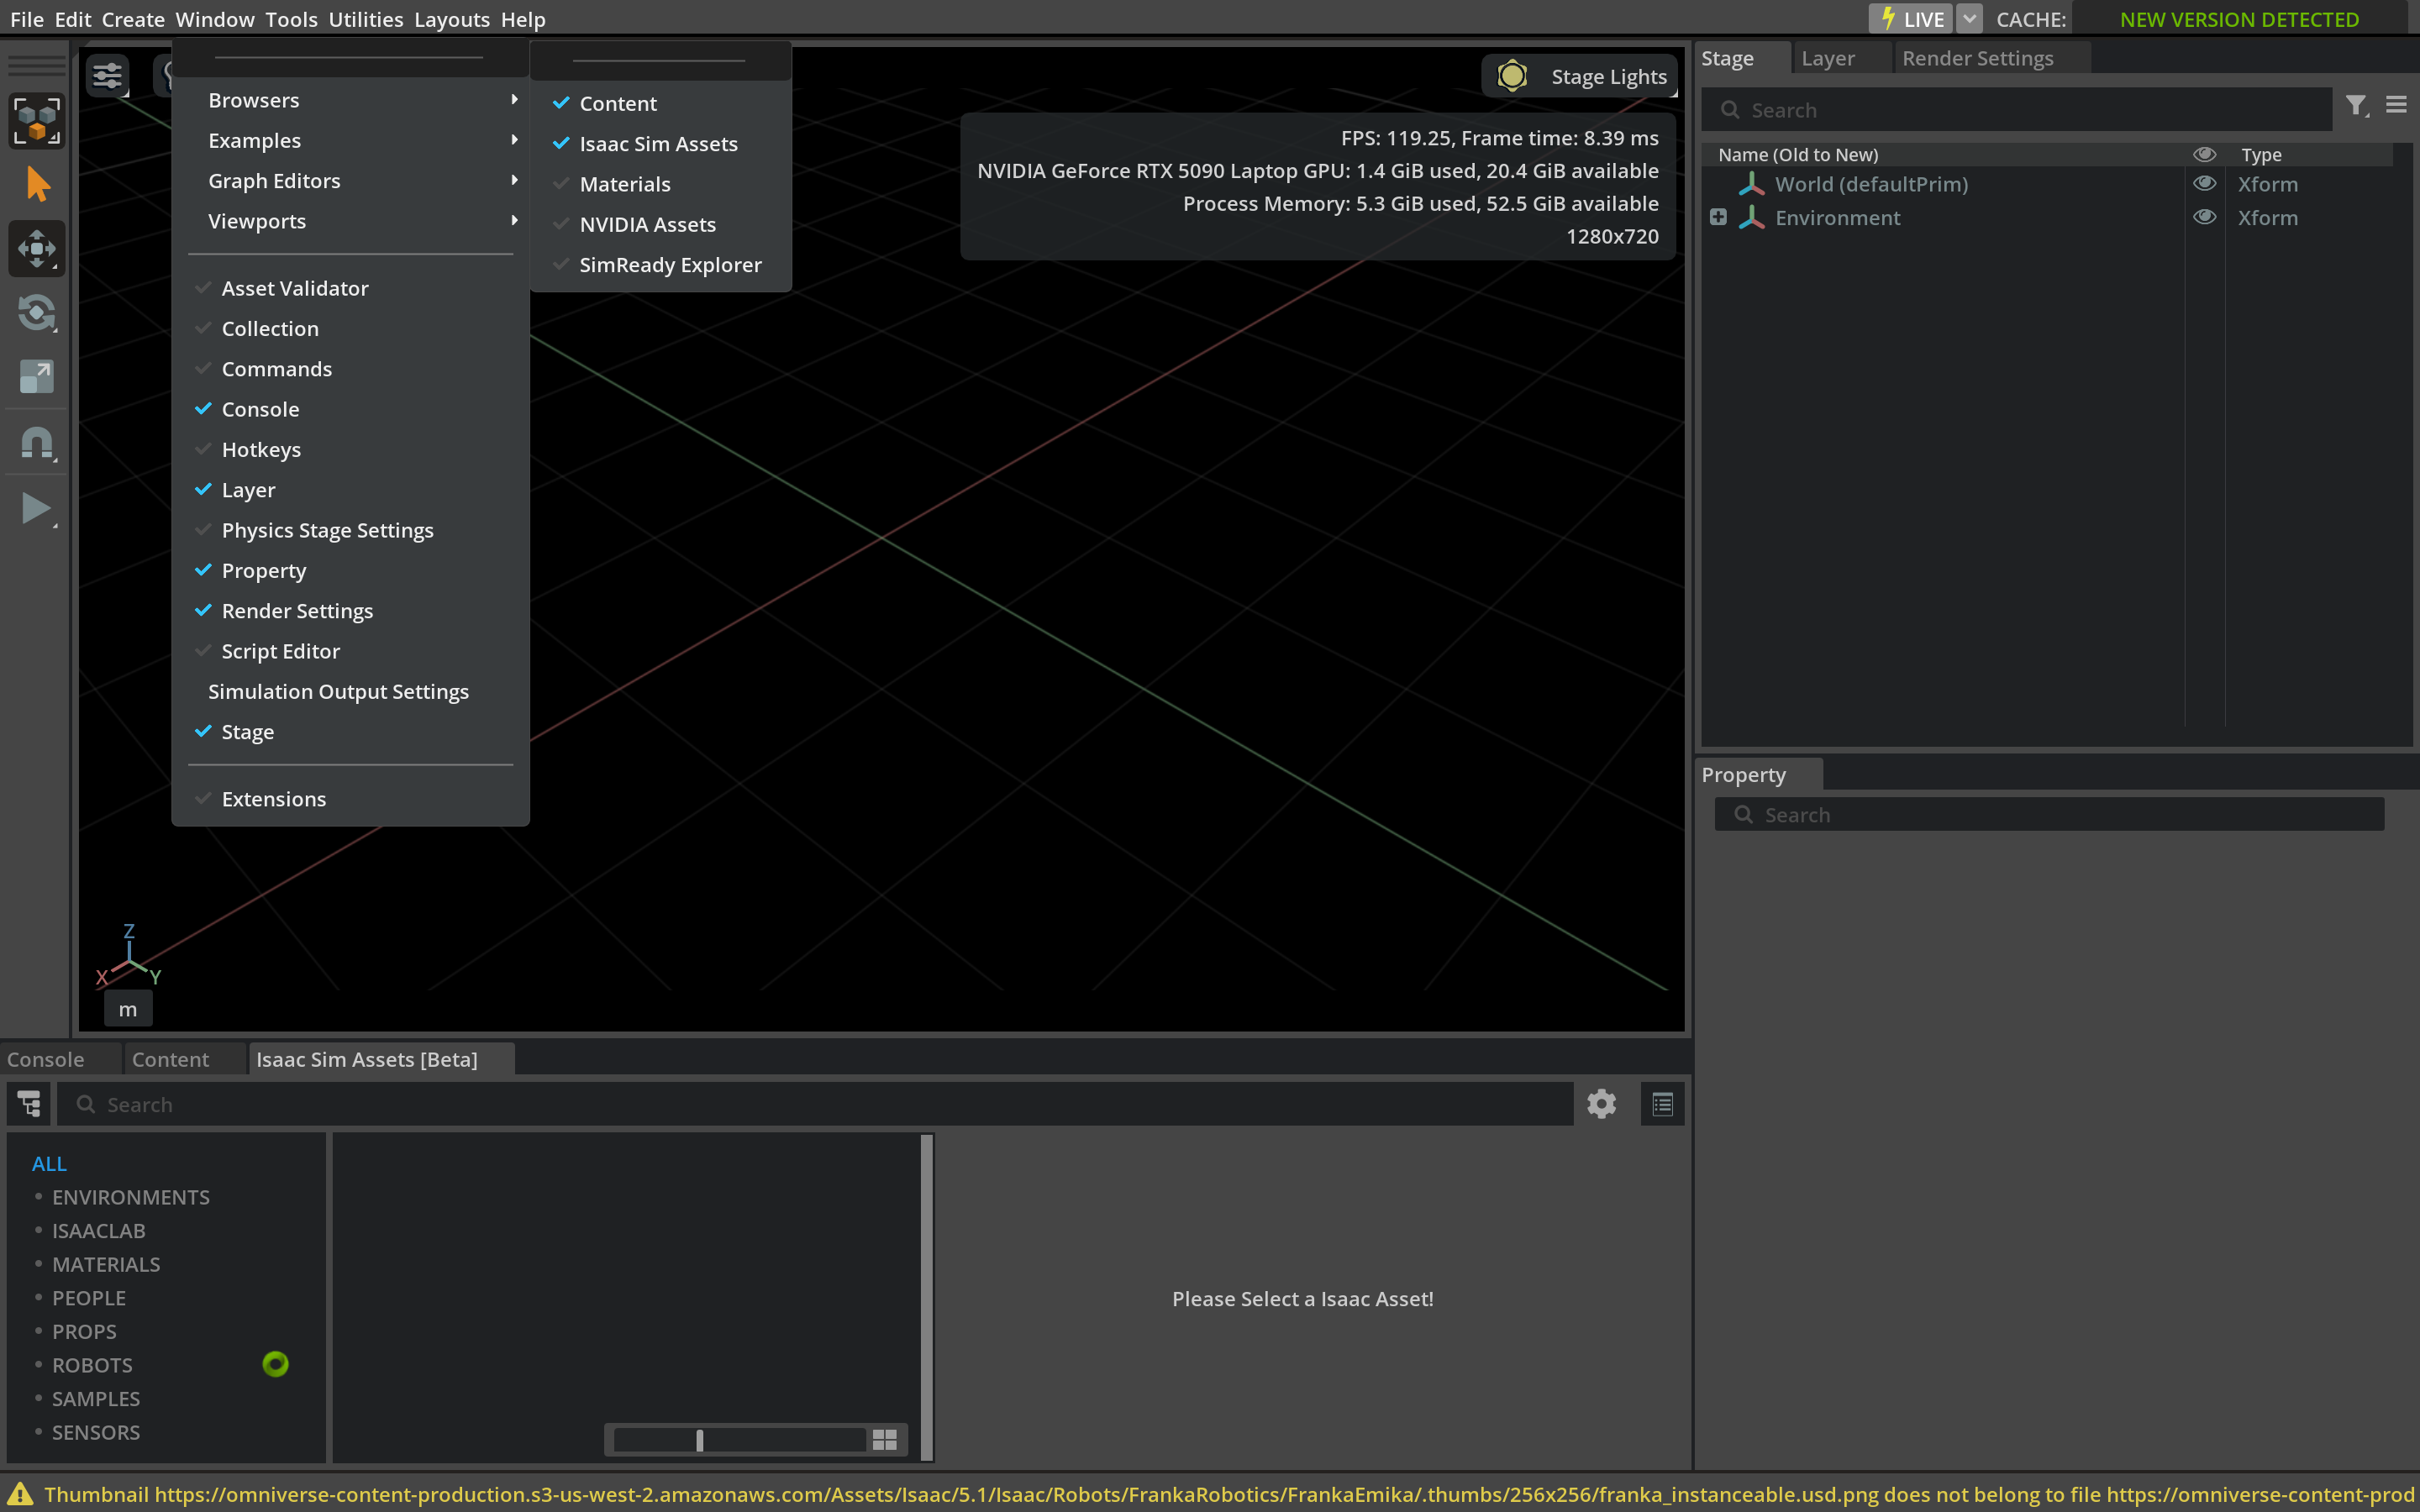
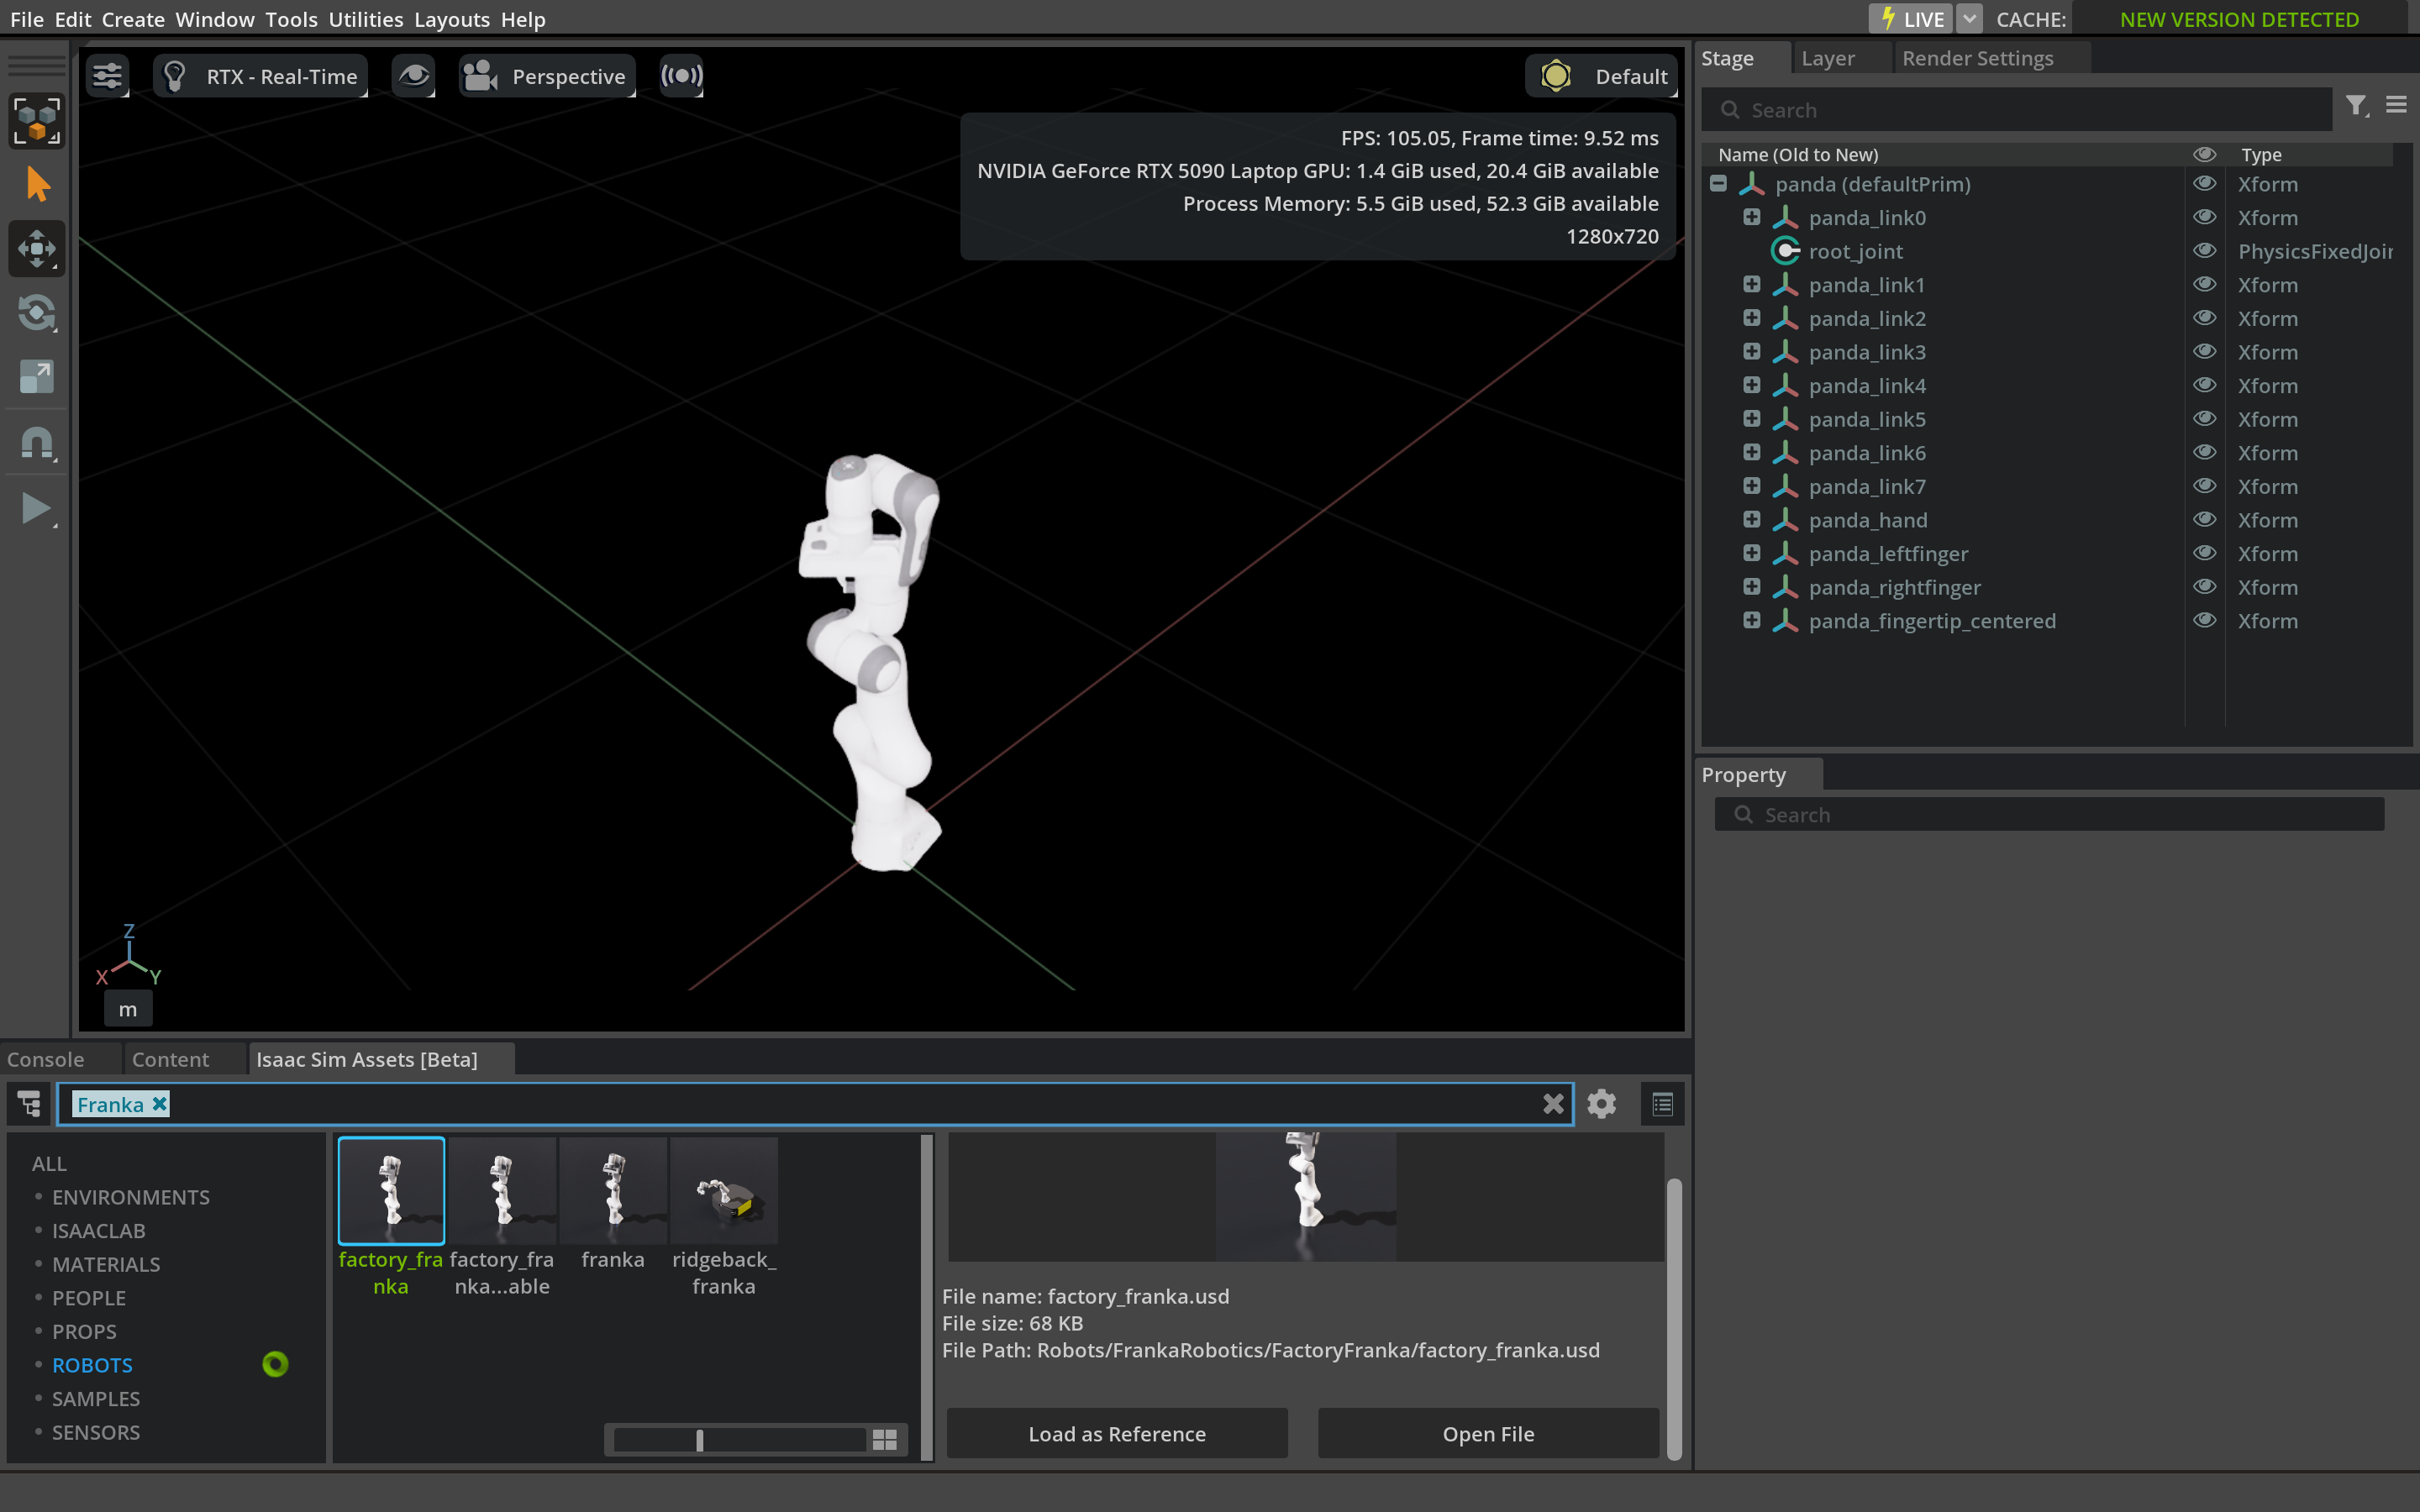
Once Isaac Sim is running:
- Go to Window → Browsers → Isaac Sim Assets
- Search for “franka” or browse the Robots category
- Double-click a Franka robot to load it
- Click Play to start simulation
Start Isaac Lab
Now let’s verify Isaac Lab works by training a reinforcement learning agent!
Step 1: Start Isaac Lab Container
Select Option 8 from the launcher to build and start the Isaac Lab container:
┌─────────────────────────────────────────────────────────────────┐
│        Isaac Sim 5.1.0 & Isaac Lab Launcher                     │
├─────────────────────────────────────────────────────────────────┤
│  ISAAC LAB OPTIONS                                              │
│  8) Start/Build Container    [Run Isaac Lab]                    │
│  9) Quick Access                                                │
│  a) Stop Container                                              │
└─────────────────────────────────────────────────────────────────┘The first time you run Option 8, Isaac Lab will build its Docker container. This takes 10-15 minutes as it installs all RL dependencies (PyTorch, RSL-RL, etc.). Subsequent starts are instant.
Step 2: Run Cartpole Training
Once inside the Isaac Lab container, you’ll see the workspace prompt:
root@physical-ai-lab:/workspace/isaaclab#Run the Cartpole training with 64 parallel environments:
./isaaclab.sh -p scripts/reinforcement_learning/rsl_rl/train.py --task=Isaac-Cartpole-v0 --num_envs=64What the command does:
| Part | Meaning |
|---|---|
./isaaclab.sh -p |
Run a Python script through Isaac Lab |
scripts/reinforcement_learning/rsl_rl/train.py |
The RSL-RL training script |
--task=Isaac-Cartpole-v0 |
The Cartpole balancing task |
--num_envs=64 |
Run 64 environments in parallel |
Step 3: Watch the Training!
You should see 64 cartpoles training simultaneously - each one learning to balance the pole through trial and error!
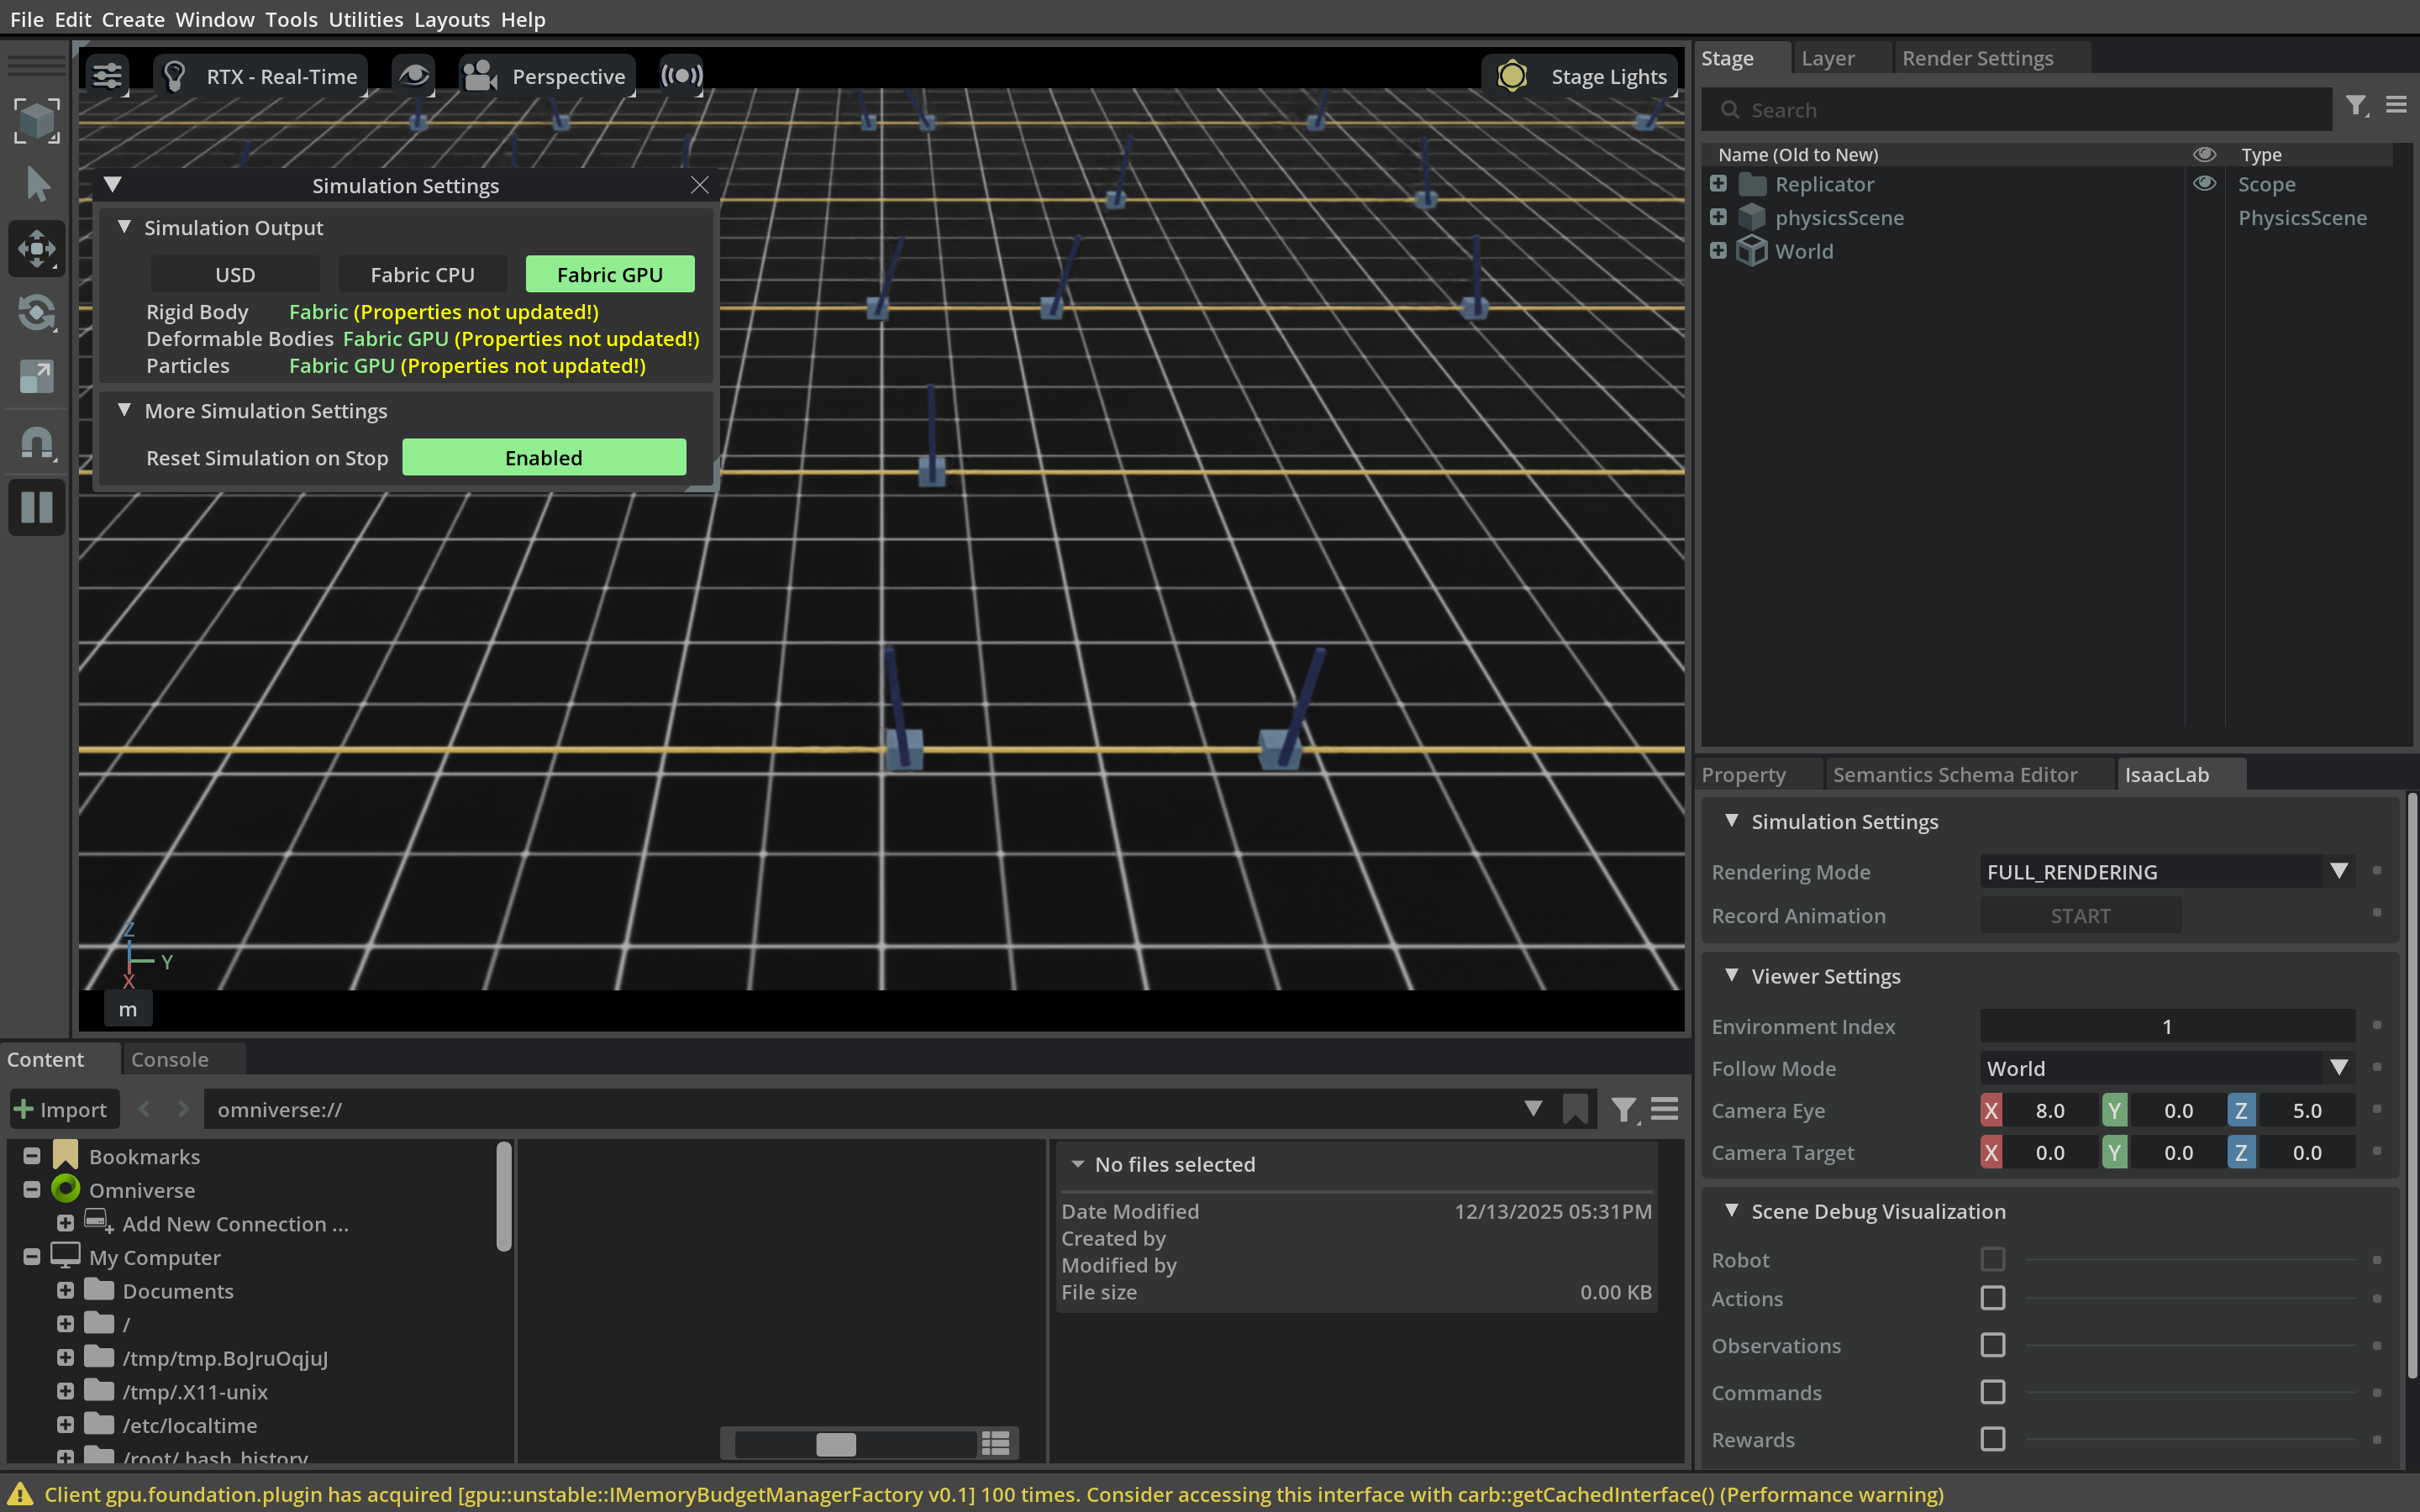
- 64 parallel environments: The GPU simulates all 64 cartpoles simultaneously
- Real-time learning: Watch the poles start wobbly and gradually stabilize
- Training metrics: The terminal shows reward values increasing as learning progresses
Other Isaac Lab Commands
# List all available environments
./isaaclab.sh -p scripts/environments/list_envs.py

# Train a different task (Humanoid)
./isaaclab.sh -p scripts/reinforcement_learning/rsl_rl/train.py --task=Isaac-Humanoid-v0 --num_envs=64

# Train with more environments (if you have VRAM)
./isaaclab.sh -p scripts/reinforcement_learning/rsl_rl/train.py --task=Isaac-Cartpole-v0 --num_envs=256
🎉 Congratulations! You now have a fully working Physical AI Laboratory with both Isaac Sim and Isaac Lab!
6. Troubleshooting
GPU Not Detected in Container
Symptom: nvidia-smi works on host but not in container
# Restart Docker
sudo systemctl restart docker

# If still not working, reboot
sudo reboot
Display Errors
Symptom: “Cannot open display” or blank window
# Allow local connections to X server
xhost +local:

# Check DISPLAY variable
echo $DISPLAY
Permission Denied
Symptom: “Permission denied” when running Docker
# Add yourself to docker group
sudo usermod -aG docker $USER
# Log out and log back in
Isaac Sim Won’t Start
Symptom: Container exits immediately
# Check Docker logs
docker logs <container_id>

# Run with verbose output
docker run --rm -it --gpus all nvcr.io/nvidia/isaac-sim:5.1.0 bash
./isaac-sim.sh --verbose
Out of Disk Space
# Check disk space
df -h

# Clean up Docker (removes ALL unused images)
docker system prune -a
7. Resources
| Resource | Description |
|---|---|
| Isaac Sim Documentation | Complete user guide and API reference |
| Isaac Lab Documentation | RL environments and training guides |
| NVIDIA Developer Forums | Community support |
| NGC Catalog | Official container images |
Conclusion
You now have a fully functional Physical AI laboratory!
What you’ve accomplished:
- Docker with GPU support
- Isaac Sim 5.1.0 for robotics simulation
- Isaac Lab for reinforcement learning
- A launcher script for easy access
Remember:
- Use
./auto_start.shfor easy access - First runs are slow (shader compilation)
- Check troubleshooting if things go wrong
Happy simulating!
Appendices
Appendix A: Manual Installation
These manual steps are an alternative to using the launcher script. Use this if you prefer full control or need to customize the setup.
A.1: NGC Login (Manual)
docker login nvcr.ioWhen prompted: - Username: $oauthtoken - Password: Your NGC API key
A.2: Create Directory Structure
mkdir -p ~/isaac-sim/{cache/kit,cache/ov,cache/pip,cache/glcache,cache/computecache,logs,data,documents}A.3: Pull Isaac Sim Image
docker pull nvcr.io/nvidia/isaac-sim:5.1.0A.4: Run Isaac Sim Manually
xhost +local:
docker run --rm -it --gpus all \
    -e DISPLAY \
    -e PRIVACY_CONSENT=Y \
    -v $HOME/.Xauthority:/root/.Xauthority \
    -v ~/isaac-sim/cache/kit:/isaac-sim/kit/cache:rw \
    -v ~/isaac-sim/cache/ov:/root/.cache/ov:rw \
    -v ~/isaac-sim/cache/pip:/root/.cache/pip:rw \
    -v ~/isaac-sim/cache/glcache:/root/.cache/nvidia/GLCache:rw \
    -v ~/isaac-sim/cache/computecache:/root/.nv/ComputeCache:rw \
    -v ~/isaac-sim/logs:/root/.nvidia-omniverse/logs:rw \
    -v ~/isaac-sim/data:/root/.local/share/ov/data:rw \
    -v ~/isaac-sim/documents:/root/Documents:rw \
    --network=host \
    nvcr.io/nvidia/isaac-sim:5.1.0
A.5: Clone Isaac Lab Manually
mkdir -p ~/docker/isaac-lab
cd ~/docker/isaac-lab
git clone https://github.com/isaac-sim/IsaacLab.git
cd IsaacLab
A.6: Build and Start Isaac Lab
python3 docker/container.py start
python3 docker/container.py enter
Appendix B: Core Concepts
This section explains Docker and Isaac Sim concepts. Skip if you’re already familiar.
What is Docker?
Think of Docker as a shipping container for software:
┌─────────────────────────────────────────────────┐
│                Your Computer                     │
│  ┌─────────────────┐  ┌─────────────────┐       │
│  │  Container 1    │  │  Container 2    │       │
│  │  Isaac Sim      │  │  Isaac Lab      │       │
│  │  Python 3.11    │  │  PyTorch, etc   │       │
│  └─────────────────┘  └─────────────────┘       │
│         Docker Engine (manages containers)       │
└─────────────────────────────────────────────────┘
Why use Docker?
- Reproducibility: Same environment everywhere
- Isolation: Won’t mess up your system Python
- Easy cleanup: Delete container, everything gone
- NVIDIA support: GPU access inside containers
What is Isaac Sim?
NVIDIA Isaac Sim is a robotics simulator that:
- Renders photorealistic environments
- Simulates accurate physics
- Supports many robot models
- Runs on NVIDIA GPUs
What is Isaac Lab?
Isaac Lab builds on Isaac Sim and adds:
- Reinforcement learning training
- Pre-built robot environments
- Training algorithms (PPO, SAC, etc.)
- Parallel environment simulation
Key Terms
| Term | Meaning |
|---|---|
| Container | Isolated environment running an application |
| Image | Template used to create containers |
| Volume | Persistent storage that survives container restarts |
| NGC | NVIDIA GPU Cloud - where NVIDIA hosts container images |